Creating a Persistence of Vision Scene
The first thing you need to do is double-click on the POV-Ray Mac application. If POV-Ray does not automatically start you up with a blank “untitled” scene, pull down the “File” menu and choose “New”.
Go ahead and copy the following Cone.pov Sample Scene File into the blank window. Don’t worry about what it means, we’ll get to that later.
[toggle code]
- #include "colors.inc"
- #include "woods.inc"
- #include "textures.inc"
-
camera {
- location <0,1,-3>
- look_at <0,0,0>
- }
-
light_source {
- <7,10,-5>
- color White
- }
-
background {
- color White
- }
-
cone {
- <0,-.8,0>,1
- <0,1.2,0>,.2
-
texture {
- T_Wood1
- }
- }
-
sphere {
- <1,1,1>, .25
-
texture {
- Apocalypse
- scale .1
- }
- }
-
plane {
- y,-.8
-
pigment {
- checker White, Yellow
- }
- }
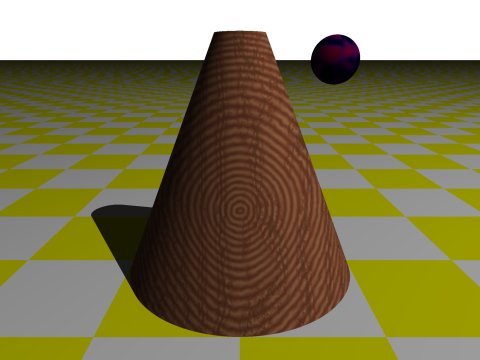
Pull down the “File” menu and “Save” this scene as “cone.pov”. This is the scene we’ll be working with as I show you where the important menu items are. This is a “scene file”. It’s how you tell POV what you want it to draw. In this case, we’re keeping it fairly simple. We want POV to draw a cone, a sphere, and a plane. We want the background color to be white. We’ve also placed the camera’s location in the scene, and a single white light source, but we’ll cover that in the next tutorial.
- Cone.pov Sample Scene File
- This sample scene creates a simple cone with a sphere near its tip.
More Information
- Official POV-Ray Macintosh Page
- Command central for Persistence of Vision/Macintosh. Look here for the latest updates, as well as links to most of the tools you’ll want for Persistence of Vision on the Mac.
POV-Ray Application Preferences
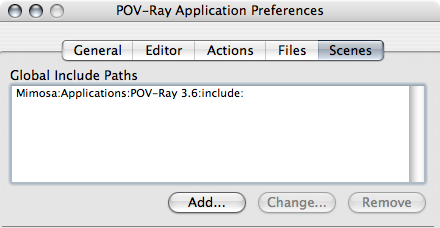
Pull down the “Edit” menu and choose “Preferences…”. The important item here is the “Scenes” tab. You will probably need to tell POV-Ray where your “include” files are.
If you look at the top of our example scene file, there are three “include” lines. These lines include special files that make it easier to work with colors, textures, and wooden textures. POV-Ray comes with a collection of these include files, but we may need to tell POV-Ray where they are.
If you do not see a line that ends with “POV-Ray 3.6:include:” in the “Global Include Paths”, click “Add…” and browse to your POV-Ray application folder. Choose the “include” folder inside your POV-Ray application folder.
POV-Ray Scene Preferences
Where the Application preferences apply to how POV works with your computer, the “Settings…” preferences change how POV creates your images from the scene file. There are a number of sets of settings, and you choose which one you’re going to change by clicking the tabs across the top of the settings window. The ones you’ll deal with mostly are the “Output”, the “Quality”, and the “Animation” settings.
At the top of each settings screen is the “Set:” menu. From here, you can Add… any custom settings so that you can remember them for later. You can also return to the default settings at any time. When you add a new set, it adds the preferences for all of the tabs to that custom set.
Scene Size
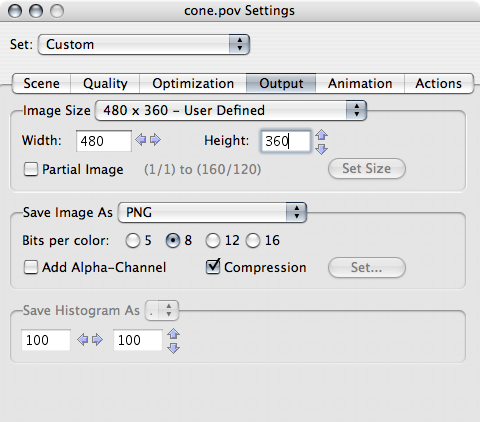
The image that you end up creating is just a computer image, nothing more. You need to tell POV what size you want the image to be. You need to tell POV the width you want the image to be, and the height you want the image to be. The larger the image, the longer it takes POV to finish creating it. You’ll probably want to choose “320 by 240” while you’re testing your images out, and then “640 by 480” for the complete image. If you want your image to be as big as your computer screen, choose that. You can either use the pull-down menu, or type the numbers into the “Width” and “Height” boxes.
I also like to use the PNG type as the Save Image As type. PNG is a useful image format for bringing in to just about any graphics application, and they can also be used directly on web pages.
Go to the Output pane and type “480 by 360” for your width and height. Then pull down the “Render” menu and choose “Render cone.pov Settings…” (or just hit Apple-R).
When that’s done, go back to Output and choose “960 by 720”. Render it again.

This image took 2 seconds on my computer.
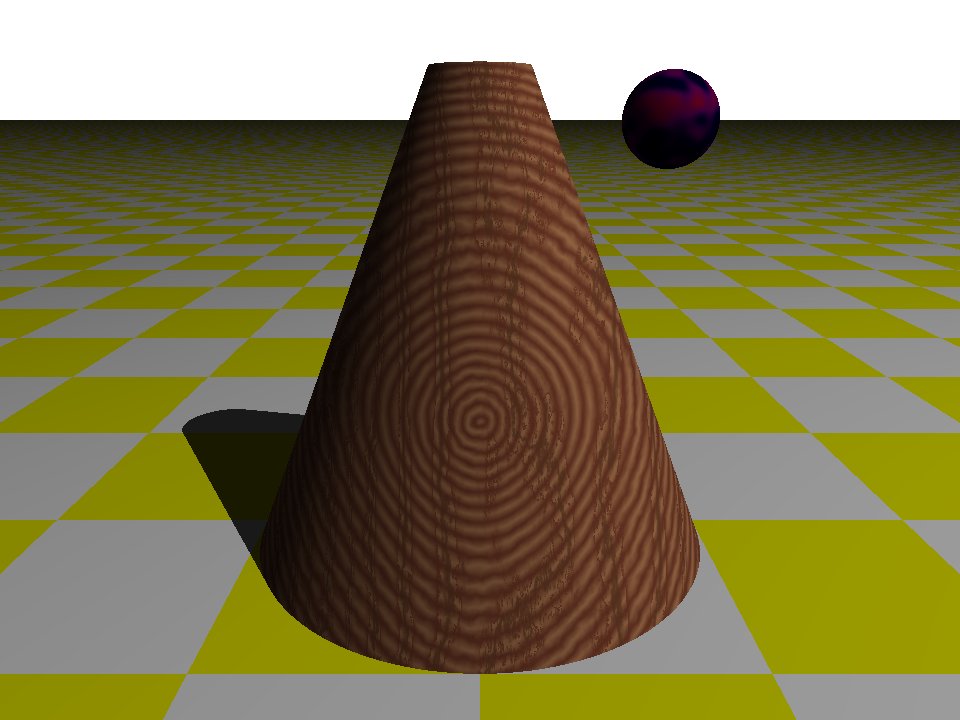
This image took 7 seconds on my computer.
Note that if you click on each of those images, you’ll see the POV “source code” for that image. Any POV images in these tutorials will be linked to their POV scene description file for you to look at. In this case, it’s the same scene file that you typed in above.
We made the second image twice as high and twice as wide, and it took about four times as long to draw. That’s the way it’s going to be. If you want an image that’s twice as high and twice as wide, that is four times the “surface area”, so it takes four times as long to create. If we made the image 3840 by 2880, we could guess that it would take about 28 seconds for POV-Ray to draw the scene.
Believe it or not, setting the scene size is actually more complicated than this, but if you stick to multiples of 160 by 120, you won’t have to worry about it right away. Your larger images will then be exact duplicates (larger and more detailed) of your smaller images. If you want to know more about setting the scene size, see Simple Photorealism using Persistence of Vision.
- Simple Photorealism using Persistence of Vision
-
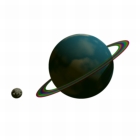 Simple photorealism for people who can’t draw. This tutorial guides you through using the free Persistence of Vision ray-tracer. You’ll create a planet, with rings and an orbiting moon set against a starry background.
Scene Quality
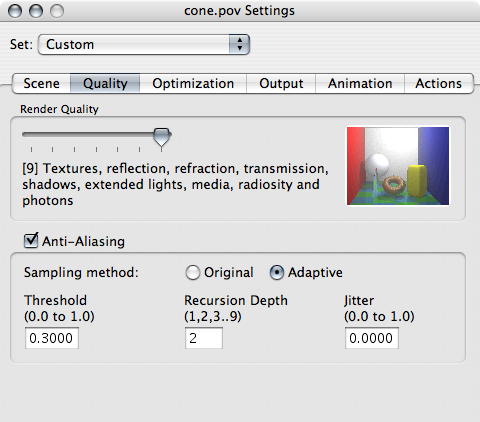
If you look closely at that image, you’ll notice little “stairs” at the edges of the cone. These are called “jaggies”. In this image they aren’t actually that bad, but often they can ruin a perfectly good image.
To get rid of jaggies, you want to “anti-alias” the image. This is in the “Quality” section of the settings. (Don’t worry about the other options around anti-aliasing. They’re for later, when you know more about how anti-aliasing works in POV.)
While you’re working on the image, leave anti-aliasing off. It slows things down. But when you’re ready to create the final image, turn it on. Go ahead and do it now: click on the “Anti-Aliasing” checkbox, and make an anti-aliased version of the 480 by 360 image. Anti-aliasing does take time: it took 4 seconds on my computer, about twice as long as it took to do the jaggy version.
There are reasons for not wanting to anti-alias your images, besides the time involved. Anti-aliased images take up more disk space than jaggy images: for you, this doesn’t matter, but if you are putting your image up on a web page, that means longer download times for your viewers. You’ll have to gauge how much the increase in quality is worth. Also, if you want your anti-aliased images to be transparent, you’ll be limited to the PNG image type. Because of the way that anti-aliasing works, if you make an anti-aliased GIF image transparent, you get a fairly ugly ‘halo’ around the edges of the objects in your image.
In general, however, the increase in quality means that you will want your final image to be anti-aliased.
POV-Ray Animation
I’m not going to go too deeply into animation. I just want to show you the options for it. First, change your scene file, where it describes the “sphere”. Add ‘rotate <0,clock*360,0>’ to the end of the sphere description, so that it looks like this:
[toggle code]
-
sphere {
- <1,1,1>, .25
-
texture {
- Apocalypse
- scale .1
- }
- rotate <0,clock*360,0>
- }
In the Output pane, set the size of the image to 320 by 240;. Set the “Save Image As” to QT Movie (Mac OS).
Click on the Set button next to Compression to choose a compression type. Choose H.264.
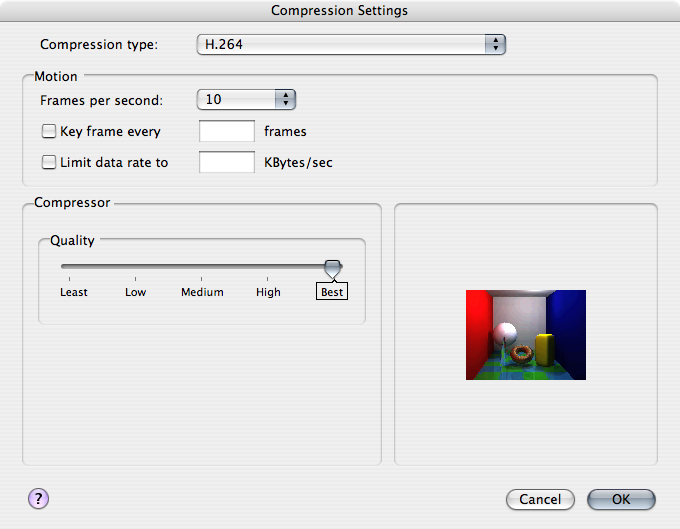
Finally, go to the ‘Animation’ pane and check “Clock Animation”. Set it to render twelve out of thirteen frames: ‘Start At’ 1, ‘End At’ 12, and “Final” 13. You’ll need to set the Final to 13 before you can set the End At to 12.
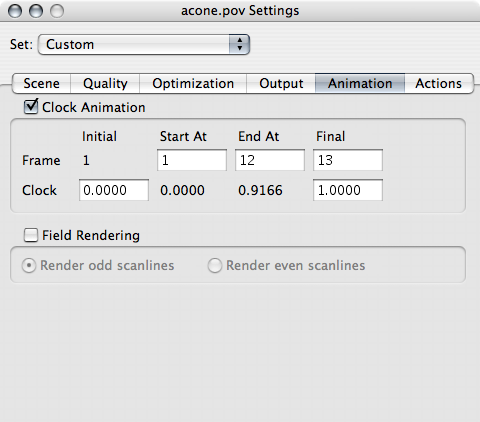
Then, start rendering! Persistence of Vision will create a twelve-frame Quicktime movie of our sphere orbiting the top of our cone. It would’ve done a thirteenth frame, but we told it to stop at 12 (otherwise, when it looped, there would be a ‘jump’ as it went from frame 13 back to frame 1). If you want the movie to be higher quality, you can give it more frames. The more frames, the smoother the movie.
If you want to publish your movie to the web, you will need to go into QuickTime Pro, and ‘Save As…’ “Make Movie Self-Contained”.
If you don’t have QuickTime Pro, you can use an AppleScript to save as self-contained. Use Script Editor to save this AppleScript as an application, and then drop your movie on top of the resulting application.
[toggle code]
-
on open theFiles
-
repeat with movieFile in theFiles
- --get filepath information
-
tell application "Finder"
- set movieName to name of movieFile
- set movieExtension to the name extension of movieFile
- set movieFolder to container of movieFile as text
- end tell
- --create the new filepath for the self-contained movie
- set baseName to (characters 1 thru -((length of movieExtension) + 2)) of movieName as text
- set newMovie to baseName & " (self-contained)." & movieExtension
- set newMoviePath to movieFolder & newMovie
- --open the movie in quicktime player and save as self-contained
-
tell application "QuickTime Player"
- open movieFile
-
tell movie movieName
- save self contained in newMoviePath
- end tell
-
tell movie newMovie
- close
- end tell
- end tell
- end repeat
-
repeat with movieFile in theFiles
- end open
