‘Scripting’ refers to the ability to tell Persistence of Vision to change the scene or objects in the scene in complex or repetitive ways. You can use POV’s scripting features to make your scenes easier to use, and you can use POV’s scripting to make your scenes more complex—or both.
There are four basic kinds of scripting in POV:
- Declarations:
- Use declarations to create ‘template’ objects and values that can be re-used.
- Directives:
- Use directives to control your scene through the POV scripting language’s special commands and functions.
- Macros:
- Macros can centralize the writing of similar lines of your POV scene.
- Functions:
- POV-Ray contains several built-in mathematical and text functions that you can use to control your scene.
And you can combine them when you get the hang of it, so that your macros and declarations include scripting to make them more versatile.
Declarations: Declaring Objects and Values
The simplest form of scripting POV is storing often-used items in a ‘variable’. You do this for two reasons. One, you then don’t have to type the item multiple times; you type it once, give it a name, and then use the name from then on. Second, if you decide to change the value, you change it in one place—the declaration—and it automatically changes everywhere else.
If you’ve already done the other tutorials in Persistence of Text, you’ve seen declarations all over. You can declare colors and locations:
- #declare tagger_red = <.8, .1, .1>;
- #declare tagger_green = <.1,.8,.1>;
- #declare camera_location = <0,0,-10>;
And then you can use those items in multiple locations in your scene:
[toggle code]
- #declare tagger_red = <.8,.1,.1>;
- #declare tagger_green = <.1,.8,.1>;
- #declare camera_location = <0,0,-10>;
-
camera {
- location camera_location
- look_at <0,0,0>
- }
-
light_source {
- camera_location
- color <1,1,1>
- }
-
plane {
- y, -1
-
pigment {
- checker color tagger_red color tagger_green
- }
- }
-
sphere {
- <0,.5,0>, 1
-
pigment {
- color tagger_red
- }
- }
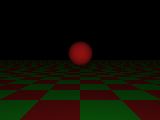
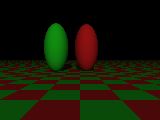
What have we done? First, we set ‘tagger_red’ to mean 80% red, 10% green, and 10% blue. Then, we set ‘tagger_green’ to be 10% red, 80% green, and 10% blue. We use ‘tagger_red’ twice in the scene. Once in the checkered plane, and once for the floating sphere. We have also set our light source to be in exactly the same place as the camera. If we decide to move the camera, the light source will move with us. What if we want the light source to be behind and above the camera? We can declare a second location that is based on the first location. Add one line after “#declare camera_location”:
- #declare light_location = camera_location + <0,10,-20>;
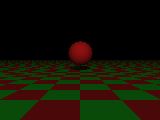
This adds 10 to the ‘y’, or height, of the camera location, and subtracts 20 from the ‘z’, or forward/backward, of the camera’s location, so that our light’s location will always be 10 units higher than our camera, and 20 units back from it. Replace ‘camera_location’ in our light source with ‘light_location’ and we can see a bit more of our plane than we could before!
Now, if we wanted to change our colors, all we need do is change the declaration. Perhaps not a big deal when we’re only using it twice, but if we are using the same color ten or twenty times, declarations ensure that we can easily change the color without forgetting one in a corner somewhere.
We can also declare entire objects. Let’s say we want more than one sphere in our scene:
[toggle code]
-
#declare floater = sphere {
- <0,.5,0>, 1
- }
-
object { floater
-
pigment {
- color tagger_red
- }
- translate <.5,0,.25>
-
pigment {
- }
-
object { floater
-
pigment {
- color tagger_green
- }
- translate <-2,0,0>
-
pigment {
- }
You use the ‘object’ keyword to mean any object. Since we don’t necessarily know what kind of an object ‘floater’ is, we just surround it with an ‘object {}’ keyword. That way, we can change the shape later on. For a simple sphere, we haven’t really saved much typing by declaring it. But it does allow us to change aspects of the object, such as the shape, more easily. Go ahead and add “scale <1,2,1>” to the floater declaration:
[toggle code]
-
#declare floater = sphere {
- <0,.5,0>, 1
- scale <1,2,2>
- }
You could also change the shape from a sphere to a square, or to any complex union, difference, or merging of objects. This allows you to start with simple shapes in your scenes, and then later replace them with more complex shapes. You might have a star appear 2,000 times in your scene. If you could make a single improvement to your ‘star’ object it will automatically improve each of those 2,000 stars!
- Sphere over checkered plane scene file
- One of the things you’ll often re-use are colors. If some colors are re-used throughout your scene, you can declare those colors at the top, and later change them at the top instead of painstakingly finding each reference to those colors.
- Declarations based on other declarations
- You can declare one variable as a variation on another variable, for example, ensuring that the light source is always near the camera.
- Declaring objects
- You can also declare objects and re-use those objects throughout your scene, possibly with slight variations such as color, scale, or location.
- Modifying declared objects
- Once you’ve declared an object, just as with a color, you can modify the object where you declare it and it will change everywhere you use it in your scene.
Directives
Suppose we want a whole bunch of green and red bubbles in our scene. Beyond typing one or two and saving typing with declarations, we now want ten, twenty, or even a hundred floaters in our scene. We don’t want to have to type a hundred objects. Let’s let POV type those objects for us.
Get rid of the scaling in the floater, and get rid of the two ‘object’s where we use the floater. Replace it with:
[toggle code]
- #declare floater_count = 10;
-
#while (floater_count > 0)
-
object { floater
-
pigment {
- color tagger_red
- }
- translate <floater_count-5,0,0>
-
pigment {
- }
- #declare floater_count = floater_count - 1;
-
object { floater
- #end
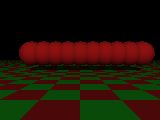
Yipes! It looks like we have ten floaters right in a row. Let’s take this a step at a time. First, we ‘declared’ that we want 10 ‘floaters’. Note that there is a semicolon at the end of that declaration. When we use simple numbers or calculations, we need to end the declaration with a semicolon. That lets POV know that we’ve finished with the calculation.
Then, we use the ‘while’ directive. This tells POV that the stuff between ‘#while’ and ‘#end’ is going to be repeated as long as a certain condition is met. In this case, that condition is, whether or not ‘floater_count’ is greater than 0. The first time through, it obviously is, because we just set it to 10, and 10 is greater than 0. So POV creates a red floater and ‘translates’ it floater_count minus 5 units, which will be 10 minus 5, or 5, which is 5 units to the right.
Finally, we redeclare floater_count to be floater_count minus 1. So the first time through, this will set floater_count to be 10 minus 1, or 9. The second time through, it will be 9 minus 1, or 8, and so on. It will stop when floater_count gets declared to be 0, because when that happens our ‘#while’ is going to ask if 0 is greater than 0. It isn’t, so POV will stop repeating the lines within the ‘#while’ and ‘#end’. And we end up with ten floaters in a row from five units right to four units left.
However, while this looks okay for a string of neatly organized floaters, it doesn’t look anything like the bubbles we were starting out to create. What we really want is to have those floaters in random locations throughout our scene. POV has a specific function just for generating random numbers. Actually, it has two functions: a random number container and a random number picker.
In order to start getting random numbers from POV, you have to tell POV that you are going to want some random numbers. You do this with the ‘seed’ function. Once you’ve ‘seeded’ a random number container, you can pick numbers out of that container with the ‘rand’ function:
[toggle code]
- #declare floater_count = 10;
- #declare Locations = seed(1);
-
#while (floater_count > 0)
- #declare x_loc = rand(Locations);
- #declare y_loc = rand(Locations);
- #declare z_loc = rand(Locations);
-
object { floater
-
pigment {
- color tagger_red
- }
- translate <x_loc,y_loc,z_loc>
-
pigment {
- }
- #declare floater_count = floater_count - 1;
- #end
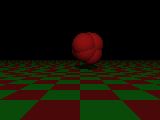
Notice that we’ve created a random number container called “Locations”, and we pick out a random x, y, and z location from it. Our bubbles still look like crap, though. They’re all snuggled right next to each other. The reason is that when we pick a number out of our random number container, it is a fraction from 0 to 1. If we want a wider range, we need to multiply our number. Change the random declarations to:
- #declare x_loc = rand(Locations)*20-10;
- #declare y_loc = rand(Locations)*5-1;
- #declare z_loc = rand(Locations)*10-3;
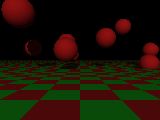
That’s beginning to look a lot more like what we want! They’re all red, though, and we want there to be a random amount of red and green ones. We also would like them to be partially transparent. So, let’s add two texture declarations and another set of random numbers:
[toggle code]
-
#declare floater_finish = finish {
- phong .5
- phong_size 140
- ambient .4
- }
-
#declare floater_red = texture {
- pigment { color tagger_red filter .75 }
- finish { floater_finish }
- }
-
#declare floater_green = texture {
- pigment { color tagger_green filter .65 }
- finish { floater_finish }
- }
- #declare floater_count = 50;
- #declare Locations = seed(1);
- #declare Colors = seed(2);
-
#while (floater_count > 0)
- #declare x_loc = rand(Locations)*20-10;
- #declare y_loc = rand(Locations)*5-1;
- #declare z_loc = rand(Locations)*10-3;
-
object { floater
-
texture {
-
#if (rand(Colors) > .5)
- floater_red
-
#else
- floater_green
- #end
-
#if (rand(Colors) > .5)
- }
- translate <x_loc,y_loc,z_loc>
-
texture {
- }
- #declare floater_count = floater_count - 1;
- #end
To choose the red or green textures for our floaters, we’re pulling a random number from the ‘Colors’ random number container that we’ve created using ‘seed(2)’. If that number is greater than .5, we choose the red texture. Otherwise, we choose the green texture. The ‘#if’ directive is just like the ‘#while’ directive, except that it doesn’t loop. It checks its condition once. If the condition is true, it does the next set of lines. If the condition is false, it either does nothing or, if there is a ‘#else’, it does what is in the ‘#else’ section.
Why did we create a separate random number container to choose the color? Why didn’t we use the same container we’d created for randomly translating the floaters? We did this because the random numbers we choose are specifically designed to be randomly predictable. Think of it this way: if you create a nice, complex scene with some randomly placed objects or randomly colored objects, and you get a good scene on Monday, and then go to sleep and decide to render the scene again at a better resolution, you don’t want your objects to change location or color. So, for any seed, the numbers that you pull out of the random number container created from that seed will always come out in the same order. If seed(1) produces .2, .51, .331, .12, etc., on one rendering, it will produce the exact same numbers on the next rendering. This is especially important if you are doing animations: just because you want a random placement of objects in your scene doesn’t mean you want those objects to jump around randomly from frame to frame!
This just means that once you’ve got your randomness working the way you want it, it isn’t going to randomly change the ‘random’ numbers it gives you. But if you go and ‘slightly’ modify that scene by adding another random element, and you sneak in and pick out a number for your new random element, but you use the same container that you created for another object in your scene, that object is now out of whack; if you had designed your scene around that object’s location, you now may have to redo some of the rest of your scene. Looking at the above numbers (.2, .51, .331, .12) as an example, suppose your scene is using that container to specify only the ‘x’ location, and you multiply by 10. So your first object is 2 units right, your second is 5 units right, your third is three units right, and your fourth 1 unit right. But later, you decide to make it a random color as well, and rather than create a new container you use the same container to pull out the ‘green’ness of your objects. You will then get your first object 2 units to the right with 51% green; your second object will be three units to the right and 12% green… you’ve lost your 5 unit-to-the-right object and your 1 unit-to-the-right object. You might get one back if the next random number happens to be 5 or 1, but it is far from guaranteed.
Basically, if you want to add additional random elements to your scene you will probably want to give those additional elements their own random number container.
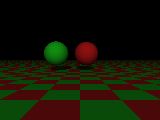
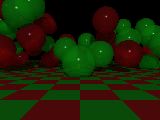
- Duplicated sphere scene
- Where declarations let us re-use the same items over and over, directives let us recreate the same (or similar) items over and over.
- Sphere clump scene
- POV’s scripting language lets us add randomness to the scene as well. Here we’ve clumped a bunch of randomly-placed spheres right up to each other.
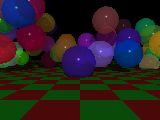
- Randomly-placed spheres scene
- By multiplying the number we get from the random number generator, we can spread the spheres apart, having them randomly float throughout our scene.
- Randomly-colored spheres scene
- If we want our spheres to be random colors, we need to specify the random color when we place the sphere, not when we declare it.
Macros
Take a look at the following declaration:
[toggle code]
-
#declare floater = sphere {
- <0,.5,0>,1
- #declare Colors = seed(2);
-
texture {
-
#if (rand(Colors) > .5)
- floater_green
-
#else
- floater_red
- #end
-
#if (rand(Colors) > .5)
- }
- }
If we use this declaration for our spheres, how many red spheres and how many green spheres will we see?
The answer is that we’ll see all the same color (and they’ll probably all be green, if you use the same version of POV that I’m using). All of these directives control lines of POV scripting. Once those lines are created they don’t change. So the above code is really just a matter of typing:
[toggle code]
-
#declare floater = sphere {
- <0,.5,0>,1
-
texture {
- floater_green
- }
- }
If what you really want is to get a randomly colored sphere every time you use one, you can go ahead and make a macro to do it. Macros are very much like declarations, except that their scripting lines don’t occur until you actually ask for them, and POV re-does them every time you ask for that macro.
[toggle code]
-
#declare floater_finish = finish {
- phong .5
- phong_size 140
- ambient .8
- }
- #declare Colors = seed(2);
-
#macro floater()
-
sphere {
- #local floater_red = rand(Colors);
- #local floater_green = rand(Colors);
- #local floater_blue = rand(Colors);
- <0,.5,0>,1
-
texture {
-
pigment {
- color rgbf <floater_red, floater_green, floater_blue, .75>
- }
-
finish {
- floater_finish
- }
-
pigment {
- }
- }
-
sphere {
- #end
- #declare floater_count = 50;
- #declare Locations = seed(1);
-
#while (floater_count > 0)
- #declare x_loc = rand(Locations)*20-10;
- #declare y_loc = rand(Locations)*5-1;
- #declare z_loc = rand(Locations)*10-3;
-
object { floater()
- translate <x_loc,y_loc,z_loc>
- }
- #declare floater_count = floater_count - 1;
- #end
Not bad. What happens here is that every time we ask for a “floater()”, the POV script between “#macro floater()” and “#end” gets completely redone. So if we ask for it fifty times, we get fifty randomly colored floaters.
You can also see a “#local” inside the macro. The “#local” directive is just like the “#declare” directive, except that any declaration “#local” makes is local only to the macro it was created in. This means that if we decide our macro is so cool we want to use it in other scenes, we can, without worrying that we might already be using “#declare” to create a color called “floater_red”, “floater_blue”, or “floater_green” for some completely unrelated use. By using “#local”, those color declarations won’t bother our macro, and our macro won’t redeclare those colors.
You can also ‘pass’ values to the macro for the macro to use. For example, instead of translating the floater ourself, we could let the macro do it for us. We might find this important, for example, if we wanted the color to be related to where in the scene the object is. Passed values are automatically ‘local’: you have to give them a local name within the macro inside the “()” in the “#macro” statement. For example, if we want to pass an x, y, and z location to position our sphere, we would use “#macro floater(x_location,y_location,z_location)”:
[toggle code]
-
#macro floater(x_location,y_location,z_location)
-
sphere {
- #local floater_red = rand(Colors);
- #local floater_green = rand(Colors);
- #local floater_blue = rand(Colors);
- <0,.5,0>,1
-
#if (z_location >4)
- #local floater_filter = 0;
-
#else
- #local floater_filter = .75;
- #end
-
texture {
-
pigment {
- color rgbf <floater_red, floater_green, floater_blue, floater_filter>
- }
-
finish {
- floater_finish
- }
-
pigment {
- }
- translate <x_location,y_location,z_location>
- }
-
sphere {
- #end
- #declare floater_count = 50;
- #declare Locations = seed(1);
-
#while (floater_count > 0)
- #declare x_loc = rand(Locations)*20-10;
- #declare y_loc = rand(Locations)*5-1;
- #declare z_loc = rand(Locations)*10-3;
- floater(x_loc,y_loc,z_loc)
- #declare floater_count = floater_count - 1;
- #end
Here, we’re having our macro set the filtering level of any object further than four units back to zero. This should speed up the rendering of our scene. When you use “#while” and “#if” inside of your macros, they get redone every time you call the macro. In the above example, every time we use our macro, POV checks to see if the z location we’ve given it is more than four. If it is, we set the filtering to 0 (meaning that the sphere won’t be transparent at all). Otherwise, we set the filtering to .75, so that it filters 75% of the light coming through it.
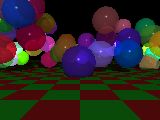
- Random colors scene
- Randomness can be applied to any numbers in your scene, including the colors you use.
- Conditional coloring scene
- Macros can take several arguments; we can use them to conditionally do one thing or the other. For example, not bother with CPU-intensive textures for far-away objects.
Functions
Now, let’s try a more complex example. POV has a number of ‘functions’ that you can use. You can see a list of them in the manual in section 4.1.3.6 (numerical functions), 4.1.4.6 (vector, or location functions), and 4.1.6.3 (text functions). For example, if you have two declared numbers and you want to use the biggest one, you would use the ‘max’ function: “#declare bigger_number = max(number_one,number_two)”. If you want the square root of a number you would use “sqrt(my_number)”.
You can use numerical functions at any point where you would use a number. If you could use -5, you can also use abs(-5) to get the absolute value of it. If you have a number predeclared as “x_location”, you could use “abs(x_location)” to get the absolute value of that number.
Let’s go ahead and put this stuff together. One of the cool things that people have used the torus shape for is to make coils. By chopping a torus in half, rotating it a bit, and then translating it up by the same amount, we can make springs. The macro feature in POV allows us to create a macro that will create different kinds of springs depending on what we want. Let’s go ahead and create a spring macro.
[toggle code]
- #declare tagger_red = <.8, .1, .1>;
- #declare tagger_green = <.1,.8,.1>;
- #declare camera_location = <0,0,-10>;
- #declare light_location = camera_location + <0,10,-20>;
-
camera {
- location camera_location
- look_at <0,0,0>
- }
-
light_source {
- light_location
- color <1,1,1>
- }
-
plane {
- y, -1
-
pigment {
- checker color tagger_red color tagger_green
- }
- }
- //creates a spring resting at y=0 and centered around the y axis.
-
#macro makeSpring (coilradius,wireradius,threadangle,coilheight)
-
#local torushalf = torus {
- coilradius,
- wireradius
- clipped_by { plane {x 0} }
- }
-
union {
- #local torusTranslation = coilradius*sin(radians(threadangle));
- #local currentTorus = 0;
- #while (2*currentTorus*torusTranslation < coilheight)
-
object { torushalf
- #local theSign = pow(-1,currentTorus);
- scale <theSign,1,1>
- rotate <-theSign*threadangle,0,0>
- translate <0,2*currentTorus*torusTranslation,0>
- }
- #local currentTorus = currentTorus + 1;
- #end
- }
-
#local torushalf = torus {
- #end
-
object { makeSpring(1,.1,8,5)
- translate <0,-2.5,0>
- rotate <0,0,90>
- translate camera_location+<0,0,6>
-
pigment {
- color rgb <0,1,0>
- }
- }
Let’s take a really close look at that macro:
- #macro makeSpring (coilradius,wireradius,threadangle,coilheight)
When we use this macro, we are going to specify the radius of the spring, the radius of the wire making up the spring, the steepness of the coils, and the height of the spring.
[toggle code]
-
#local torushalf = torus {
- coilradius,
- wireradius
- clipped_by { plane {x 0} }
- }
We’re going to make this spring out of a bunch of torii. We use #local to declare a torus of radius “coilradius”, and thickness “wireradius”, and chopped in half by the plane that is perpendicular to the ‘x’ axis. This is going to give us a vaguely u-shaped half of a torus, which we can reference as “torushalf”.
[toggle code]
-
union {
- #local torusTranslation = coilradius*sin(radians(threadangle));
- #local currentTorus = 0;
We’re going to make this spring out of the union of a whole bunch of those torus halves. We are going to need to know, mostly, how high we need to move each torus half in order to get the angle to work right. There is a formula for that sort of thing, which I looked up in an old math book that I have left over from high school. (If you don’t have a math book, you will probably find one useful. Anything to do with geometry will do you well.)
This formula is from a formula for the sides of a triangle. After we rotate the torus half, if we want to know how high the rotated part is we can find out by getting the height of a triangle whose top side is the coil’s radius and whose top side is at an angle to the ground of threadangle. The formula is the coilradius times the sin of the angle.
There is a complication thrown in: POV uses angles in degrees to rotate objects. But it uses angles in radians when working with the sine, cosine, and other angle-related functions. So, we have to convert our angle in degrees to angle in radians. Fortunately, there is a function that does this for us: “radians(threadangle)” will give us ‘threadangle’ in radians.
Then, we take the sine of that angle, and we multiply it by the coilradius. We also declare a ‘counter’ so that we know how many torii we’ve got stacked up. We’ll need to multiply the ‘torusTranslation’ by the ‘currentTorus’ counter and then again by two to get where we need to be.
- #while (2*currentTorus*torusTranslation < coilheight)
As long as the height of our top torus is less than the height we want, add another torus on top. Note that this means that our coil’s height is not going to be exactly the coil height requested. It will be the smallest height that is greater than or equal to the requested height.
[toggle code]
-
object { torushalf
- #local theSign = pow(-1,currentTorus);
- scale <theSign,1,1>
We use the pre-declared ‘torushalf’ object for this part of the spring. Remember that we’ve cut the torus in half. So every other addition to our spring needs to be the other half. The easiest way to do this is to just scale the torushalf by negative 1 every odd time. Since we’re keeping track of ‘currentTorus’, we can just use every odd currentTorus. How to use that to get -1 every odd time? If you recall from that high school math book, if you multiply negative one by itself, it will be positive every even time, and negative every odd time, but will still be ‘1’. There is a function that multiplies a number by itself a specified number of times: the ‘pow()’ function. So we use that here to multiply ‘-1’ by itself ‘currentTorus’ times. Every odd currentTorus, ‘theSign’ will be declared to be ‘-1’.
[toggle code]
-
- rotate <-theSign*threadangle,0,0>
- translate <0,2*currentTorus*torusTranslation,0>
- }
Then, we rotate the torushalf by the requested angle. Half the time we rotate it positively, the other half negatively, and we use ‘theSign’ to handle that as well. And once we’ve rotated, we translate the torushalf up by the required amount to make its ends line up.
- #local currentTorus = currentTorus + 1;
- #end
We add one to ‘currentTorus’ so that our running count of parts is correct. And we ‘#end’ the ‘#while’ loop.
[toggle code]
-
- }
- #end
We close the brace for the ‘union {’, and we ‘#end’ the macro. And that’s it! Remember that, with macros, you will find them most useful if you put them in ‘include’ files, so that you can use them in multiple scenes.
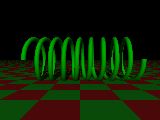
- Coil macro scene
- We can combine declarations, directives, macros, and functions to write a macro that creates a coil or spring on demand.
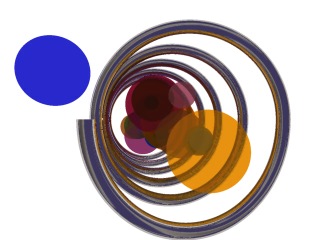
- Scripting coil scene file
- Scripting allows you to create shapes that are themselves made of repetitive shapes, such as a coil wrapped around floating spheres.
