“Just how do you put an image into the correct format? I’d really like to learn that.”
What image format you use depends on the software you’re using, who your audience is, and what kind of quality you need in the end result. Certain image formats have special features that other formats lack. Basically, for the web, you need to use either:
- PNG
- GIF
- JPEG
- Quicktime
And probably in that order: if PNG handles your needs, it is a better choice than GIF; if GIF works, it is a better choice than JPEG. If an animated GIF works for you, that’s better than a Quicktime movie. But as you move up that list, you get much higher quality images or additional features.
GIF
This is the simplest format. It is best for images with a small number of sharply defined colors. Cartoon images that are created directly onto the computer are almost always best as GIF images.
GIF can handle up to 256 colors, and no more. If your image uses fewer than 256 colors in powers of 4, you can reduce the image size by reducing the number of colors that the GIF file thinks it needs. The break points are: 2 colors, 4 colors, 16 colors, which (depending on what image editor you are using) might be listed as 1 bit, 2 bit, and 4 bit. The full 256 colors will be 8 bit. If you can reduce the number of colors in your image so that it uses fewer than 16 colors, fewer than 4 colors, or down to two colors, you can vastly reduce the size of the resulting file.
One color in a GIF image can be designated ‘transparent’, allowing the web page’s background to show through in the parts of the image that are that color. You don’t see any of that color: transparency is either on or off. If you specify yellow as the transparent color, you won’t see any yellow in your image, because yellow has become transparent. Only one color can be the transparent color.
GIF images can also be easily ‘interlaced’, which allow them to ‘fade in’--useful for people with slow connections, as they get to see the image (albeit faded) faster. An interlaced GIF is nothing more than storing only every fourth row starting with the first, every fourth row starting with the second, every fourth row starting with the third, and every fourth row starting with the fourth. This causes the image to fade in like a shutter, as the first set of rows is displayed, then the second, the third, and the fourth.
GIF images can also be a simple movie, or ‘animation’. A GIF animation is basically just a series of GIF images stored as a single file. The computer plays each of those images rapidly, like a flip-book, and you see an animated image. Because it is basically just a series of GIF images, your file size will be multiplied by the number of ‘frames’ you put in your movie. If you can keep the motion to a small portion of the total image, you can ‘optimize’ your animated GIF. An optimized animated GIF stores only the smallest square that surrounds all changed pixels. If your image is 40 by 40, but only the middle 20 by 10 pixels change in frame 2, frame 2 will only store the 20 by 10 (or 200) pixels, instead of all 1600 (40 by 40).
|
This is a nice transparent image, but you don’t have to look too closely to see ‘banding’. This image should have been a JPEG, but I needed it to be transparent. The only other choice would have been PNG, and PNG support in web browsers is not very good yet: most notably in this case, Netscape does not support PNG transparency. |
|
This is a nicely colored image--no banding--but it has jagged lines where they should be straight. Again, I needed this image transparent. In order to get rid of the ‘jagged lines’ I would have had to use gradated colors to make the line look smoother. Since GIF can only make one color transparent, this would put an ugly halo around the bars, as you can see in the second image. (Read on for a further explanation of this.) |

|
This is an animated GIF. It consists of a small number of images played rapidly. If you look closely, you can see the lower quality of the ‘golden’ vase. But since the animated text draws attention away from it, the lower quality isn’t obviously detrimental, and by the time the animation ends, we’ve got a simple black and white image. |
JPEG
This format was designed for photographic quality images. Photographs and photorealistic images are almost always best as JPEG. These are the kinds of files that, when you save them in Photoshop, can barely fit on a floppy disk. JPEG’s advantage is that it creates very small files and maintains good quality in the resulting image. The JPEG format allows you to choose a balance between small file size and good image quality. The more you ‘compress’ the image, the more quality is lost in the image. JPEG works with millions of colors.
Because JPEG compression loses pixels (albeit hopefully pixels you don’t care about) it is sometimes called a ‘lossy’ compression. When working with JPEG images, you always want to keep the original. If you work on a JPEG image multiple times, it keeps losing pixels each time you save it, very much like taking a video tape and re-recording it onto another video tape, then taking that video tape and re-recording it, etc. Save your original image in a non-lossy format such as the default format for your image editor, or PNG. Whenever you make a change, make it to the original, and then re-save as a JPEG format image.
JPEG normally must save an image in millions of colors: you can’t, as in a GIF, reduce the number of colors in order to get dramatic savings in file size. If you reduce the number of colors what you get is a poor quality image. However, JPEG does have a special ‘greyscale’ mode: if you want a black and white photo rather than a color photo, you can convert the image to ‘greyscale’, which uses 256 shades of grey rather than millions of colors. This can give you small but significant file size savings.
|
This is the same image as you saw above, but I ‘anti-aliased’ it to get rid of the jaggy images. ‘Anti-aliasing’ looks much better with JPEG than with GIF, generally. ‘Anti-alias’ means, use a gradient of colors to background in order to make the edges look smoother. |

|
The fine changes in color for the star background, as well as the smooth shape of the vase ‘negative’, would look horrible as a GIF. |
|
This is a greyscale image. By making it a ‘black and white photo’ instead of a ‘color photo’, I was able to keep the image quality higher and file size smaller. A color version of this with the same file size would have a much lower quality image. |
PNG
This is a new format and not widely supported. It combines some of the advantages of GIF and JPEG: it can work with millions of colors; it can compress photos very well with no loss of quality. It can also be made transparent, but whereas GIF allows you to set one color as transparent, PNG allows you to set a transparent channel which allows for varying degrees of transparency. If you have ever seen an unsightly halo around a transparent image on the web, you’ve seen why this is important. What happens is that you’ve got the edge of something in your image going from the object’s color to white; you make white transparent, but you can’t make barely off white transparent. So, barely off-white shows up as an ugly halo. PNG allows barely off-white to be slightly less transparent then white, somewhat barely off-white to be somewhat less transparent than off-white, etc.
PNG is almost always a better choice than GIF. Where a GIF is appropriate, a PNG image will be smaller. Make sure that you set your image editor to use 256 colors or less if that’s important, since that’s the limit of a GIF.
|
This is a PNG image. It should (if it shows up at all) be transparent. (if you see a white background, it isn’t transparent: the background behind the image is actually a light blue). This file is larger than the equivalent JPEG, but is also much better quality. |
Quicktime
Quicktime is designed for movies. As the most widely distributed movie-playing software for both platforms, it is probably the best choice for web movies. Quicktime is for ‘photographic’ quality movies, as opposed to the simpler, flipbook-like, GIF movies. When you save a collection of images as a Quicktime movie, you get to choose how it is compressed, as well as strike a balance between file size and quality. Quicktime itself is not a compression format: it is a way of allowing compression ‘plug-ins’. If you have a Macintosh, you have about 10 different kinds of compression for your Quicktime movies. You choose them when you make your movie.
Different plug-ins work better for different kinds of images. Some plug-ins try to maximize image quality, others try to reduce file size. They all do slightly or greatly different things to reduce the file size. Most of the better ones compress across frames as well as compressing each image that makes up the frame. Whereas the GIF can only remember that a single block of the image hasn’t changed, most Quicktime compression schemes can remember many blocks, thus storing only the part of the image that has actually been modified. This means that you can increase the movie’s quality without necessarily increasing the movie’s file size proportionally. If you double the number of frames in your movie, for example, you have also probably vastly increased the number of things that stay the same per frame.
The best compression format for the web is currently ‘H.264’ compression. This requires the latest version of Quicktime, but Quicktime is free. It can’t hurt to play around with the other formats, of course.
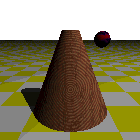
| This is a simple Quicktime movie created from a number of the "cone" images above. | |
| A somewhat more ambitious, but still fairly simple, Quicktime movie. |
Reducing File Size
When designing images for your web pages, you want to make the file size of your images as small as possible while still retaining the quality of your images.
You can vastly reduce file size by reducing image size: file size is basically proportional to the width times the height of the image. This means that halving the image’s size can divide the image’s file size by four! If your image is 300 pixels by 200 pixels, the computer has to store 300x200, or 60,000 pixels, in the file. If you half the size of the image—to 150 by 100—you reduce the number of pixels by four, to 15,000 pixels.
When working with GIFs, you can reduce the file size by reducing the number of colors in the image. GraphicConverter has an option for “minimizing” color usage. It looks at all the colors in your image and counts them up. If you have 256 or less, it tags the image as a 256-color image; if 16 colors or less, it tags the image as a 16-color image; if 4 colors or less, as a four-color image, and if 2 colors or less, as a 2-color image.
You can also, in most image-editing software, force the image down to the next lowest number of colors. Your software will then try and find the best ‘approximation’ of the image given the lower number of colors. Sometimes reducing the number of colors in an image has very little effect on the image’s quality. If so, you should take advantage of the resulting file size savings.
When working with JPEGs, you can trade quality for file size. The lower quality you are able to get away with, the smaller the file size. Usually, you will use a slider to choose between high, medium, and low quality. In most editors today, you can actually see the file size and image quality change as you move the slider.
When working with photographs or photographic-quality images, JPEGs will usually create the smallest file sizes. When working with simple drawings, GIFs will usually create the smallest file sizes. Both JPEGs and GIFs can create higher-quality photographic-quality images if you use ‘greyscale’ to create black-and-white images. Greyscale uses 256 shades of grey to make your image look much like it came from a black-and-white camera.
Image Editors
Photoshop can save as most of these; the latest might even be able to do animated GIFs. I actually use Photoshop LE occasionally. It is the free Photoshop that comes with some scanners.
Mostly, however, I use Gifbuilder and GraphicConverter. I use Gifbuilder for creating animated GIFs. I use GraphicConverter for converting images from one format to the other, as well as working with number of colors and image size. Gifbuilder is freeware, and GraphicConverter is shareware, for the Mac. It has a very useful feature with regards to JPEGs: when saving an image as JPEG, you can see the resulting size of the file and a preview of the quality of the image, as you slide from ‘high’ to ‘low’ compression. GraphicConverter can also take multiple images and convert them to animated GIFs or Quicktime movies. Its major claim to fame is the ability to read just about every image format out there, and convert to just about any image format you would want.
Recently, I’ve found both GIMP and Inkscape to be great ways of making new images. GIMP is a great photo manipulator, and Inkscape is a fine draw program.
Any good software archive should get you shareware or freeware software to do this stuff.
More Information
- GIMP
- The GIMP image manipulation program is one of the best free software packages of any kind. Fully multi-platform, the GIMP “is suitable for a variety of image manipulation tasks, including photo retouching, image composition, and image construction”.
- GraphicConverter
- GraphicConverter allows you to take pictures from just about any source and turn them into gifs or jpegs that you can use on the net. You can modify them in numerous ways, and even create them from scratch. If you’re a programmer, you can create your own ‘plug ins’. It supports animated GIFs, quicktime movies, and the PNG graphic format. It can convert between most graphic formats you are ever likely to run across—even the old TRS-80 graphics.
- Inkscape
- “Inkscape is an Open Source vector graphics editor. Supported features include shapes, paths, text, markers, clones, alpha blending, transforms, gradients, patterns, and grouping. Inkscape also supports Creative Commons meta-data, node editing, layers, complex path operations, bitmap tracing, text-on-path, flowed text, direct XML editing, and more. It imports formats such as JPEG, PNG, TIFF, and others and exports PNG as well as multiple vector-based formats.”
- Software archive—Version Tracker
- If you’re looking for free, inexpensive, or really expensive software, there are lots of places to go. Version Tracker is fairly nice, and has a decent enough comment system.