Dreamweaver makes it fairly easy to make simple web pages using MySQL and PHP. The screenshots on this page are from Dreamweaver MX 2004.
Create Select Statement
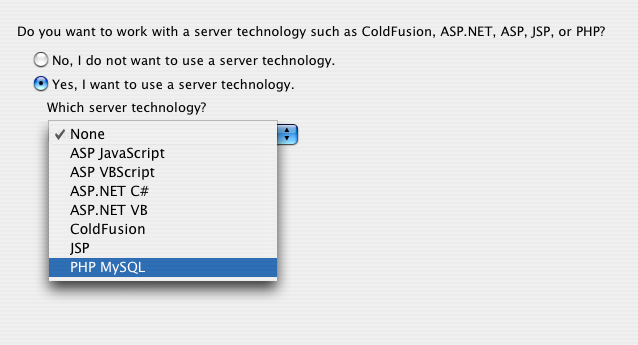
The first thing you need to do is tell Dreamweaver that your site is a dynamic site using PHP/MySQL server technology.
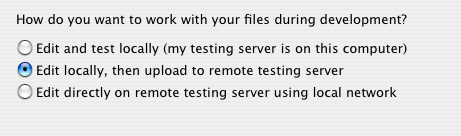
Then, you’ll need to tell it where you want your “test server” to be. Normally, you’ll edit locally, then upload to a remote testing server (as I’ve shown below). In this case, however, we’ll want to edit and test locally. We set up our database on “this computer”.
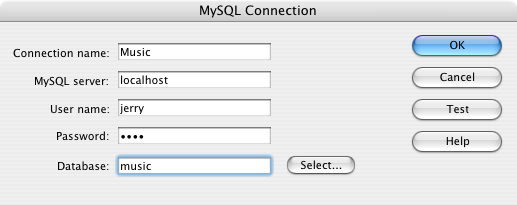
You’ll also need to tell Dreamweaver how to connect to MySQL. Go to the Applications toolbar and choose the Databases tab. Click on the “+” and make a new database connection.
If this were a live database, you would have a special username and password just for use on the web, and you would put that information into the “MySQL Connection” window. In this case, we’ll use the username and password we set up for this class.
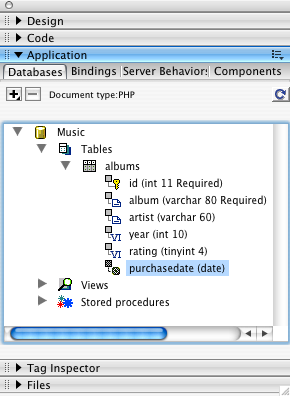
If all goes well, Dreamweaver can now list the tables in your database and the fields in those tables.
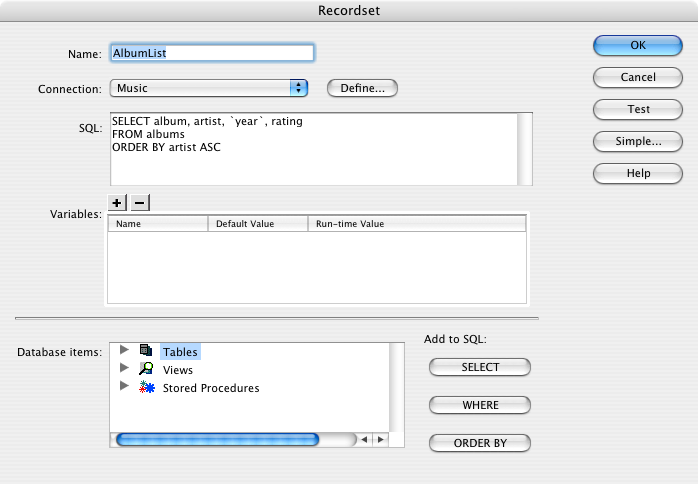
Now, in the Bindings tab, we need to make a new record set.
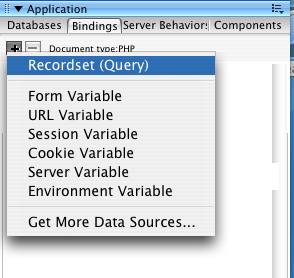
A record set is a select statement. For simple uses, Dreamweaver can create the select statements for us; all we have to choose are the fields we want to display and the order we want them displayed in.
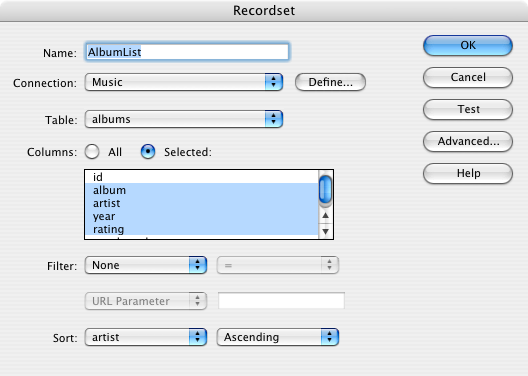
If you want to take over from Dreamweaver, you can click the “Advanced…” button and see—and modify—the select statement that Dreamweaver created.
Display Select Results
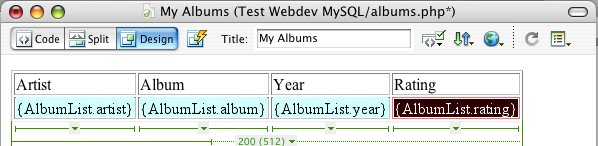
Now that we have a select statement, we need to display the resulting rows on our web page. The most obvious way of showing a bunch of rows is to make a table.
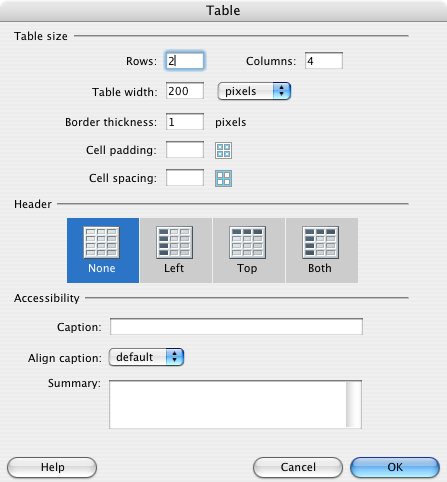
Give the table two rows, and one column for each field we’ll be displaying. Here, I assume we’ll be displaying the artist, the album, the year, and the rating.
Set up the headers and drag fields over from the “Databases” tab.
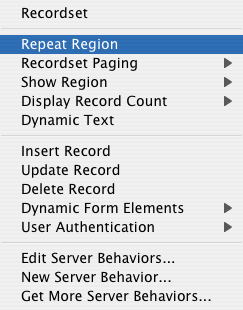
As it currently stands, if we publish this page and view it, we’ll only see the first record. We need to tell Dreamweaver to repeat the second row for every record. First, highlight the entire row. Then, choose “Repeat Region” from the Server Behaviors tab.
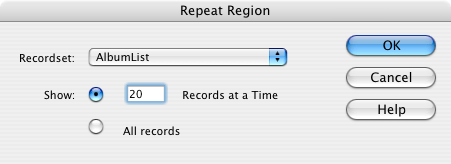
Specify the record set that is going to be repeated, and how many records you want to show at one time. For small result sets, you can simplify things by showing all records. In this case, we have hundreds of albums, so we’ll show twenty at a time.
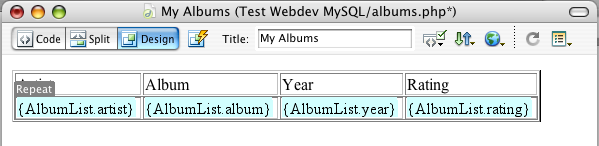
You’ll know that the row is a repeat region by the gray “Repeat” tab on its upper left.
Now, Dreamweaver shows us the first twenty records. We need a way for our readers to page through the list of albums. In the Server Behaviors tab, we also have “Recordset Paging”. There is one each for first page, previous page, next page, and last page. Go ahead and add one of each.
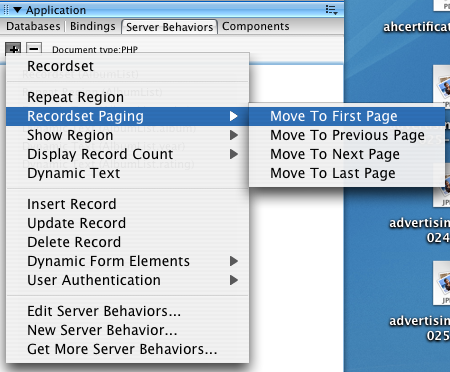
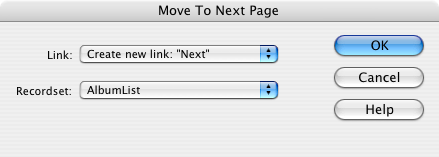
Each time, you’ll get a simple configuration window. Make sure you choose the correct record set and that the link is what you expect it to be. You can always cancel if it isn’t right.
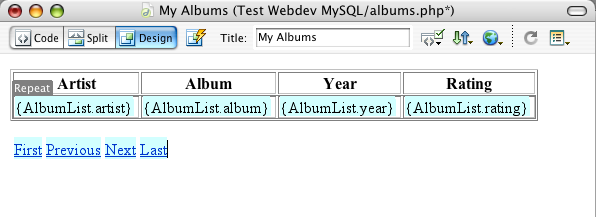
Once you’ve done that, you should have a page that looks something like this, with one header row and one repeating row, and a couple of simple navigation links on the bottom of the page.
On the web, this will be displayed as:
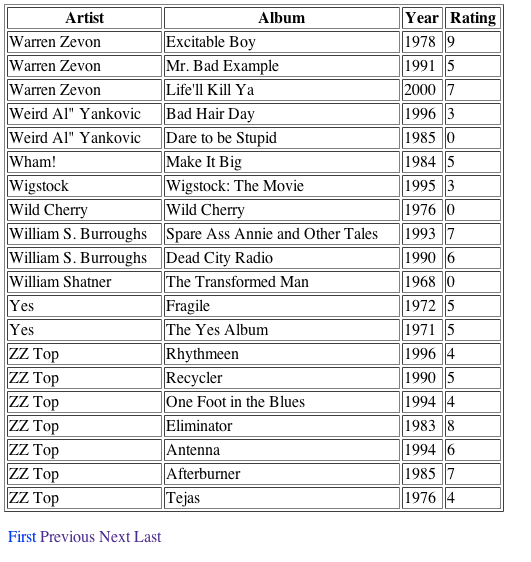
This, for example, is the last page of albums.
More with Dreamweaver
There is a whole lot more you can do with MySQL in Dreamweaver, such as make forms and link the forms to a database. That’s a whole other tutorial, however.
