 If you have a larger file, you can create a table of contents that automatically has named anchors for each headline and a link to each headline.
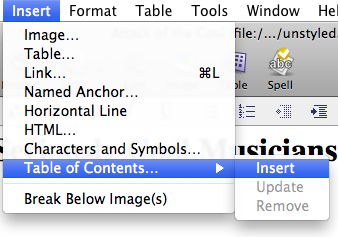
Click the mouse where you want the table of contents to be. Then pull down the “Insert” menu and choose the “Table of Contents…” submenu and the “Insert” item.
A “Build table of contents from” box will pop up. If you have correctly used heading levels for your headlines you don’t need to do anything else.
 Click “Make the contents of the table read-only” if you want to keep from accidentally changing the table of contents.
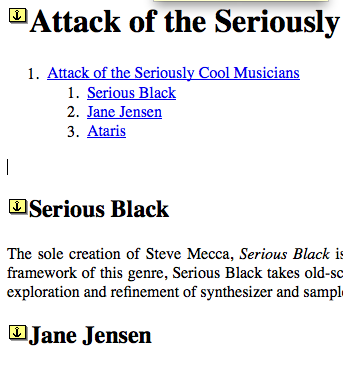
Your table of contents appears, fully linked to the sections of your document.
If you marked the table as read-only, you can drag the table to other places within your web page.
If you make changes to your page and want to update the table of contents, go to the Insert menu, choose the Table of Contents submenu, and choose “Update”. Your table of contents will be updated.
If you choose to delete your table of contents, you must use the “remove” item from that submenu. While Netscape will let you delete the table of contents by clicking on it and deleting, this will leave the anchors in place.
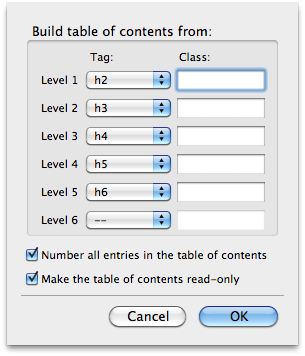 If you have only one level one headline, you might not want that in your table of contents. Remove the current table of contents and insert a new one. This time, under the “Tag:” column, move the heading levels all up by one, so that the first level of your table of contents is the h2 tag, the second level is the h3 tag, and so on.
Make level six unused, as there is no h7.
The Tag menus list all of the tags used in your document, so you can use any tag you wish. But the headline tags are the easiest to use and the most useful for this purpose.
