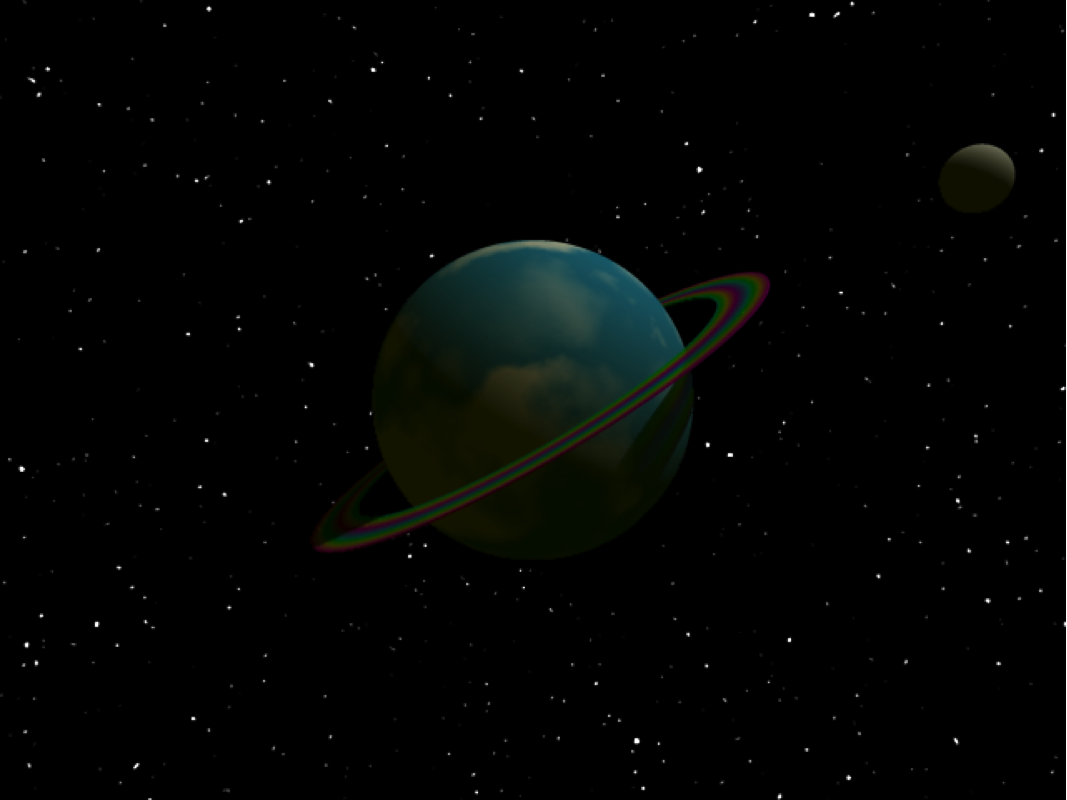
Our planetary model needs a moon. Let’s add a smaller sphere orbiting our big blue sphere. We’ll make this one gray, and angle it just a bit less than we angled the planet’s rings.
 //the moon
sphere {
<6, 0, 0>
.4
pigment {
color Grey
}
rotate <0, 0, 27>
}
We’ve put this moon out six units (six meters? we may want to rethink our scale) from the center of the universe. Remember that our central sphere has a radius of 2 units. So the moon will be about 4 units away from the planet’s surface.
Then we rotate it just 27 degrees around z. Rather than having it stick all the way off the edge like that, though, let’s put it on the other side of the planet. Make that rotate line be:
 rotate <0, 200, 27>
to rotate it 200 degrees around y first, before rotating it around z. This puts the moon down along the lower left, just above the rings.
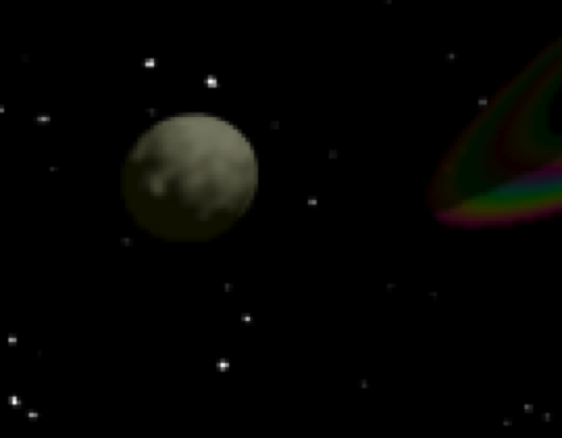
Which is all fine and good, except that this is the most boring moon I’ve ever seen. It is completely smooth. We could try to add some pigment to it, but we really do want it to be grey, we just need some bumps on the surface.
There is a related section for objects, similar to pigment but which modifies the surface of the object. This is the normal section. It is called “normal” because that is a mathematical term for, basically, a pole that is perpendicular to the surface of an object. By altering the normal, we alter the appearance of the surface.
The normal section uses patterns just as the pigment section does. In fact, the same patterns will generally work in both places. Here, we are going to use the “bump” pattern to add bumps to the moon. Add, below the moon’s pigment:
normal {
bumps
scale .1
}
 We have to scale the bumps because the moon is smaller than one unit in radius. In fact, it’s smaller than one unit in diameter: its radius is .4, so its diameter is .8. Patterns tend not to be as visible if they are larger than the object they are applied to, so we are scaling this pattern down to 10% of its default size.
The moon is now bumpy, but it isn’t bumpy enough. Some patterns will let us increase their strength. We can change the size of the bumps by adding a number after the word bumps. The default is .5. Change it to 1.5:
normal {
bumps 1.5
scale .1
}
 The moon is now nicely bumpy.
To be more precise, the normal section does not modify the surface of the object. It modifies the way that light bounces off of the surface of the object. If you look closely at this bumpy moon you’ll see that its outline remains completely spherical. What we’re really creating here is the illusion of bumpiness. But life is an illusion, raytracing doubly so. Modifying the normal to a surface rather than the surface itself is a shortcut that makes it easier for us to create basically sphere-like objects without having to draw out every bump and crack. It also makes it easier for POV-Ray to render the image of our scene. Because it is easier, POV-Ray takes less time to render the scene to an image.

Related Pages
- Tutorials
- Your Children
- AppleScript Basics
- Breaking In to Mac OS X
- Carnival of HTML
- CSS
- Easy Web Design
- Education
- History of the Internet
- HTTP headers
- JavaScript for Beginners
- MySQL for Other Applications
- Negative Space Spaced Out
- Perls Before Swine
- Persistence of Text
- PHP: Hot Pages
- PowerShift
- PyTown
- Recommended Reading
- Simple Photorealism
- Software Select
- Evaluating Information
- Gender Neutral Instructions
