- Find all parent mailboxes in macOS Mail—Wednesday, September 6th, 2023
-
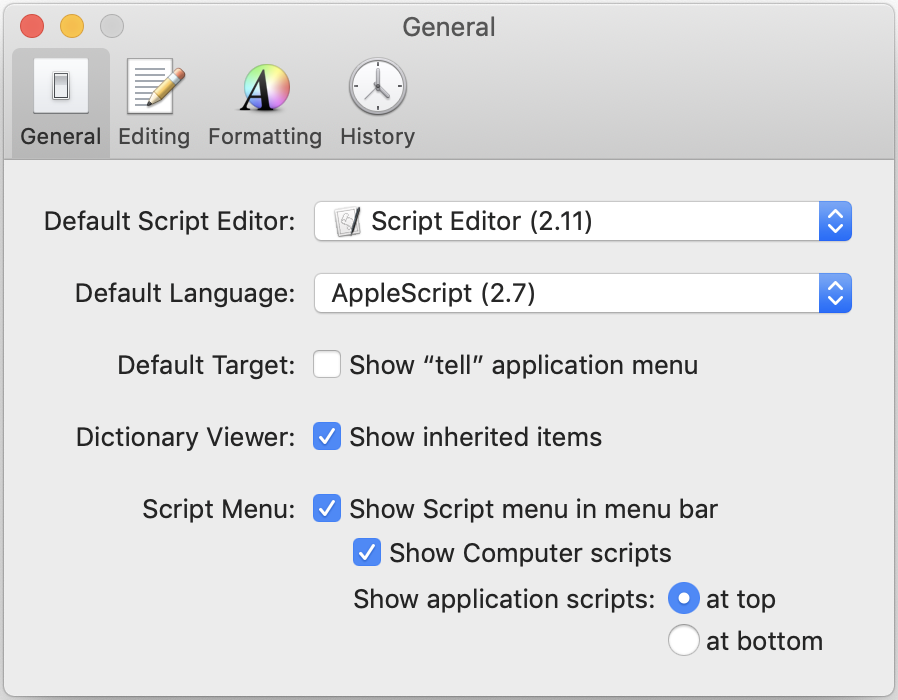
Make sure Script Menu is enabled in Script Editor.
I am an information packrat; I never throw out emails, and have messages dating back to the last century. I manage this using hierarchical mailboxes to keep the archives from cluttering up my Mail window.
I have Rules set up to send various messages directly to the mailbox where they should be stored, and then Smart Mailboxes to display unread messages of various classifications: Unread Mail, Unread Mass Mails, Unread Spammy, and Unread Junk, each less critical than the previous.
In the past, it’s been easy enough to see where any message is stored. The macOS Mail app has acted like any other application on the Mac: documents (i.e., messages) could display the full path to the document by option-clicking the document’s title (i.e., the message’s subject) in the window’s title bar.
As far as I can tell, this is no longer possible. Mail has been moving away from a document-based model toward a flat, search-based model, and no longer makes it easy—or even possible—to find the full path to a viewed message. The immediate parent mailbox’s name is displayed in the sidebar, but the mailbox’s parent is nowhere to be found. So that I can see easily enough that the order I’m waiting on is in the eBay mailbox. But not that the eBay mailbox is in the Purchases mailbox of the Finances mailbox. The latter two are completely hidden.
Obviously, however, the Mail app itself knows where these messages are, and that information can be displayed using AppleScript.
[toggle code]
-
tell application "Mail"
- set mailboxPaths to ""
-
repeat with currentMessage in (get selection)
- set mailboxPath to ""
- set messageMailbox to the mailbox of currentMessage
-
repeat while (exists name of messageMailbox)
- set mailboxPath to the name of messageMailbox & ":" & mailboxPath
- set messageMailbox to the container of messageMailbox
- end repeat
- set mailboxPaths to mailboxPaths & mailboxPath & return
- end repeat
- end tell
- display dialog mailboxPaths buttons ("OK")
-
tell application "Mail"
- JXA and AppleScript compared via HyperCard—Wednesday, August 9th, 2023
-
All this for a script that will be used no more than a handful of times, to restore long-replaced data from the nineties. It’s time to quote Douglas Adams again.
In A HyperCard Time Machine I wrote that I also seriously considered writing the script as a JavaScript (JXA) app. In fact, I did write the script as a JavaScript app. It was a toss-up to the end which version I was going to use, so they’re both fully-working versions.
One advantage the JXA version has is not requiring old-school, BASIC-style manipulation of strings to extract the current card number and the total card count from the window title. Instead of grabbing the location of the final slash, which required serious gymnastics in AppleScript, the JavaScript solution can use a regular expression that is both shorter and more reliable:
[toggle code]
- titleRegex = new RegExp("^(.+[^ ]) *([1-9][0-9]*) *\/ *([1-9][0-9]*)$");
- …
- titleParts = titleRegex.exec(title);
- filename = titleParts[1];
- currentCard = titleParts[2];
- totalCards = titleParts[3];
JXA also doesn’t use
tellblocks. It places the application in a variable, and the things we want to tell it to do can be handled at any point without worrying about how a tell block affects the syntax. At the beginning of the app, I did:- app = Application.currentApplication();
- app.includeStandardAdditions = true;
- system = Application("System Events");
This gave me the current application and System Events. The current application is necessary for dialog with the user, which is why I’ve also included the Standard Additions on it. The Standard Additions include Display Dialog and Choose Folder.
- A HyperCard Time Machine—Wednesday, July 19th, 2023
-

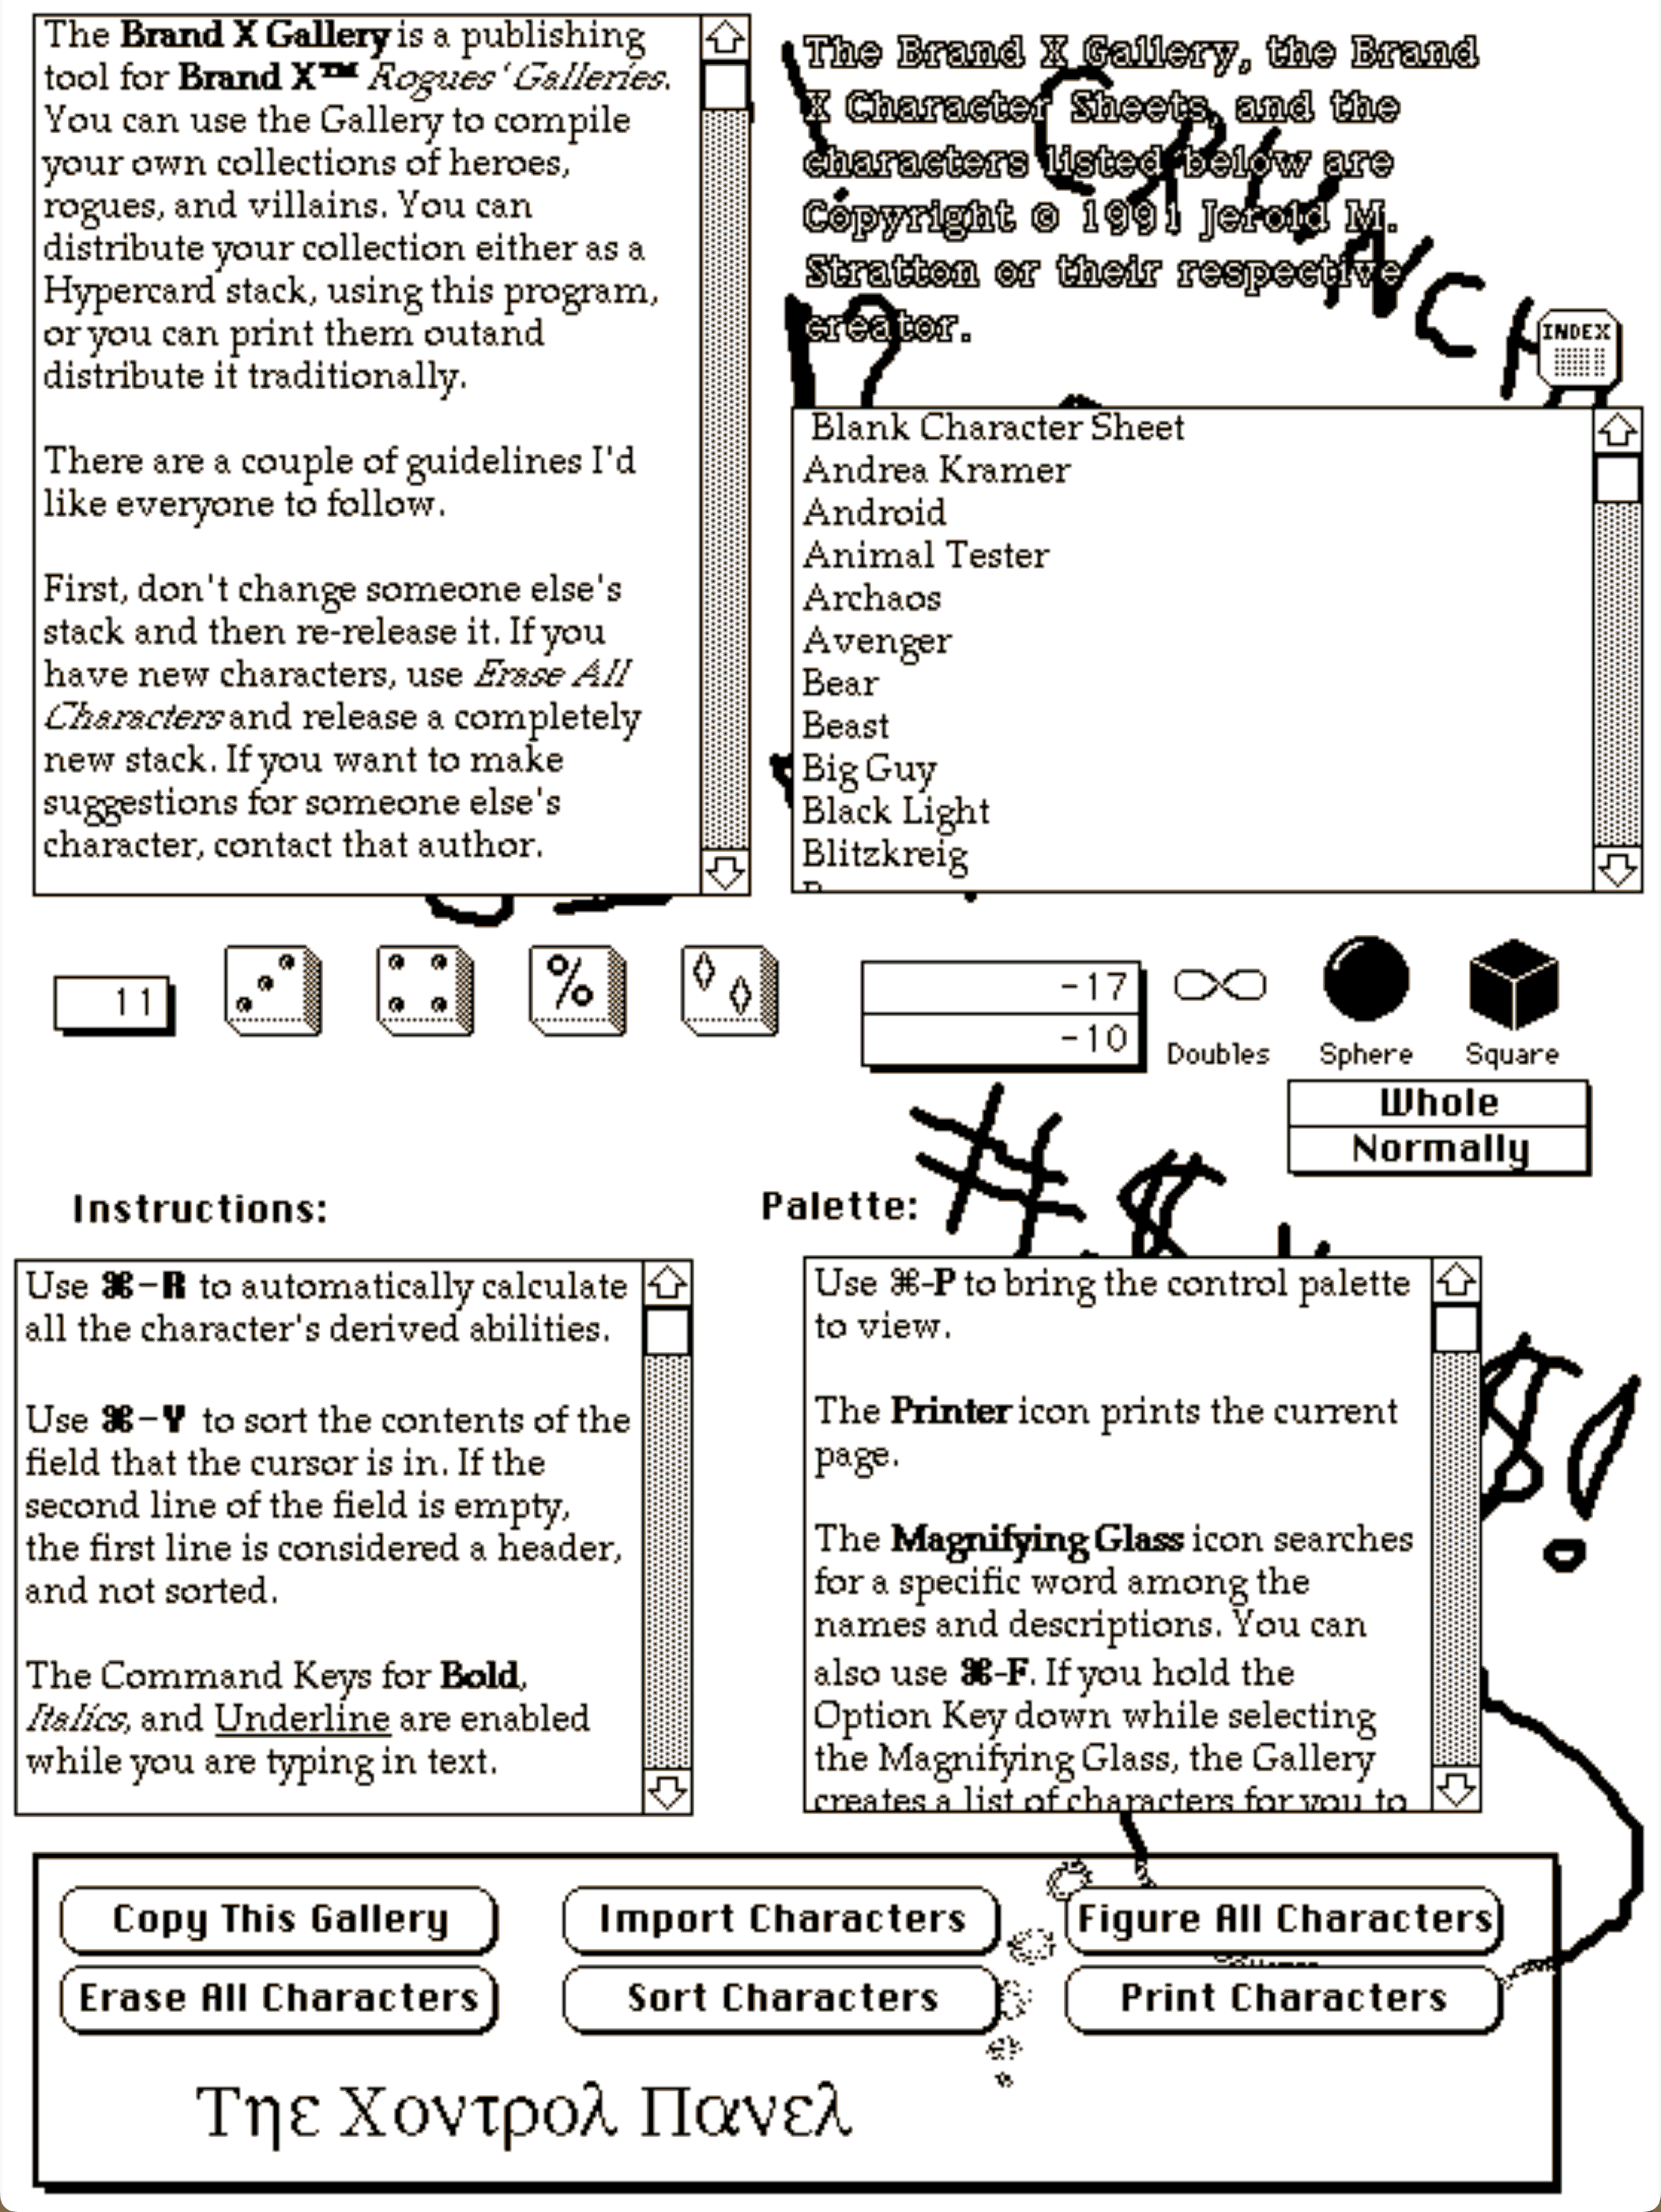
This was a tool for an early role-playing game. And looks it.
My second programming job out of college started as a HyperCard stack. HyperCard was an amazing tool not just for programmers, however, but especially for the weekend programmer or even the weekend non-programmer. It didn’t require any programming to get started. Just put some text placeholders on a background card, some buttons, maybe add a pre-created action to a button such as “move to next card”, and you had a very simple visually-oriented application that responded in a manner customized for you and your data.
There were a lot of non-programmers who used HyperCard and graduated to weekend programming. Because after you wrote your text or placed your graphics or added a button with a standard action, if you wanted to add code to that object, you could. You might start with slinging messages from object to object, or performing simple math on one of the text placeholders.
HyperTalk was not object-oriented in the sense that programmers mean when they talk about object-oriented programming. But it was object-oriented in the sense that programmers explain object-oriented programming to non-programmers. Every object on the screen could contain code that responded to specific actions. Each card could respond to keystrokes. A text box could respond to typing. Cards, text boxes, buttons, and images could respond to mouse actions. Keystrokes, mouse actions, and custom functions were all messages. And each object could send messages to other objects.
HyperCard was often used for databases; the card metaphor was especially apt for that. For example, I had a database of superheroes and supervillains in the Men & Supermen superhero role-playing game.
The game used meters, but clicking on the word “Height” on the character sheet would calculate and then display the character’s height in feet and inches:
- Creating searchable PDFs in Ventura—Wednesday, June 14th, 2023
-
I’ve updated my searchablePDF (Zip file, 8.9 KB) script with a workaround for new behavior in Ventura. As you can see from my archive of old promotional cookbook pamphlets I’ve been using it extensively—and I have a lot more to come! Reading these old books and trying out some of their recipes has been ridiculously fun, and even occasionally tasty.
Recently, a friend of mine gave me an old recipe pamphlet in very bad shape; but it isn’t currently available on any of the online archives, so I decided to scan it anyway, more for historical purposes than as a useful cookbook. This was the first archival scan I did since upgrading to Ventura, and when I was finished and created the PDF, it was practically unreadable.
It was also a lot smaller than the source images. All of the previous PDFs had very predictable file sizes. When running this script under Monterey, all I had to do was sum up all of the source images (easily done by just doing Get Info on the folder they’re in) and that was the size of the resultant PDF file.
In retrospect, it sounds like in Monterey, where I originally wrote the script, PDFKit was re-using the original image data. I always scan at somewhere from 300 to 600 dpi. In Ventura it seems to be regenerating the image data and using the lower resolution of PDFs to do so. PDFs use 72 dots per inch; but PDFKit in Monterey did not downgrade the actual images to 72 dots per inch. Ventura does.
No problem, I thought, I’ll just increase the image’s size before creating the
PDFPage. This worked—to improve the image’s quality. But the PDF opened in Preview as if it were bigger than the screen! Sure enough, Preview reported the document as being some immense number of inches wide and tall.While flailing around looking for a solution, I noticed that if I didn’t bother trying to normalize the images to always be the correct ratio (i.e., for a 4x6 book, the ratio should be ⅔) but just assigned the 4x6
pageSizetoimage.sizeit both maintained the image quality and it created PDFs of the correct size in inches.Because the image wasn’t normalized to the PDF’s size, however, there was weird white space either vertically or horizontally, depending on whether the original image was slightly too wide or slightly too tall.
- Create searchable PDFs in Swift—Wednesday, March 1st, 2023
-
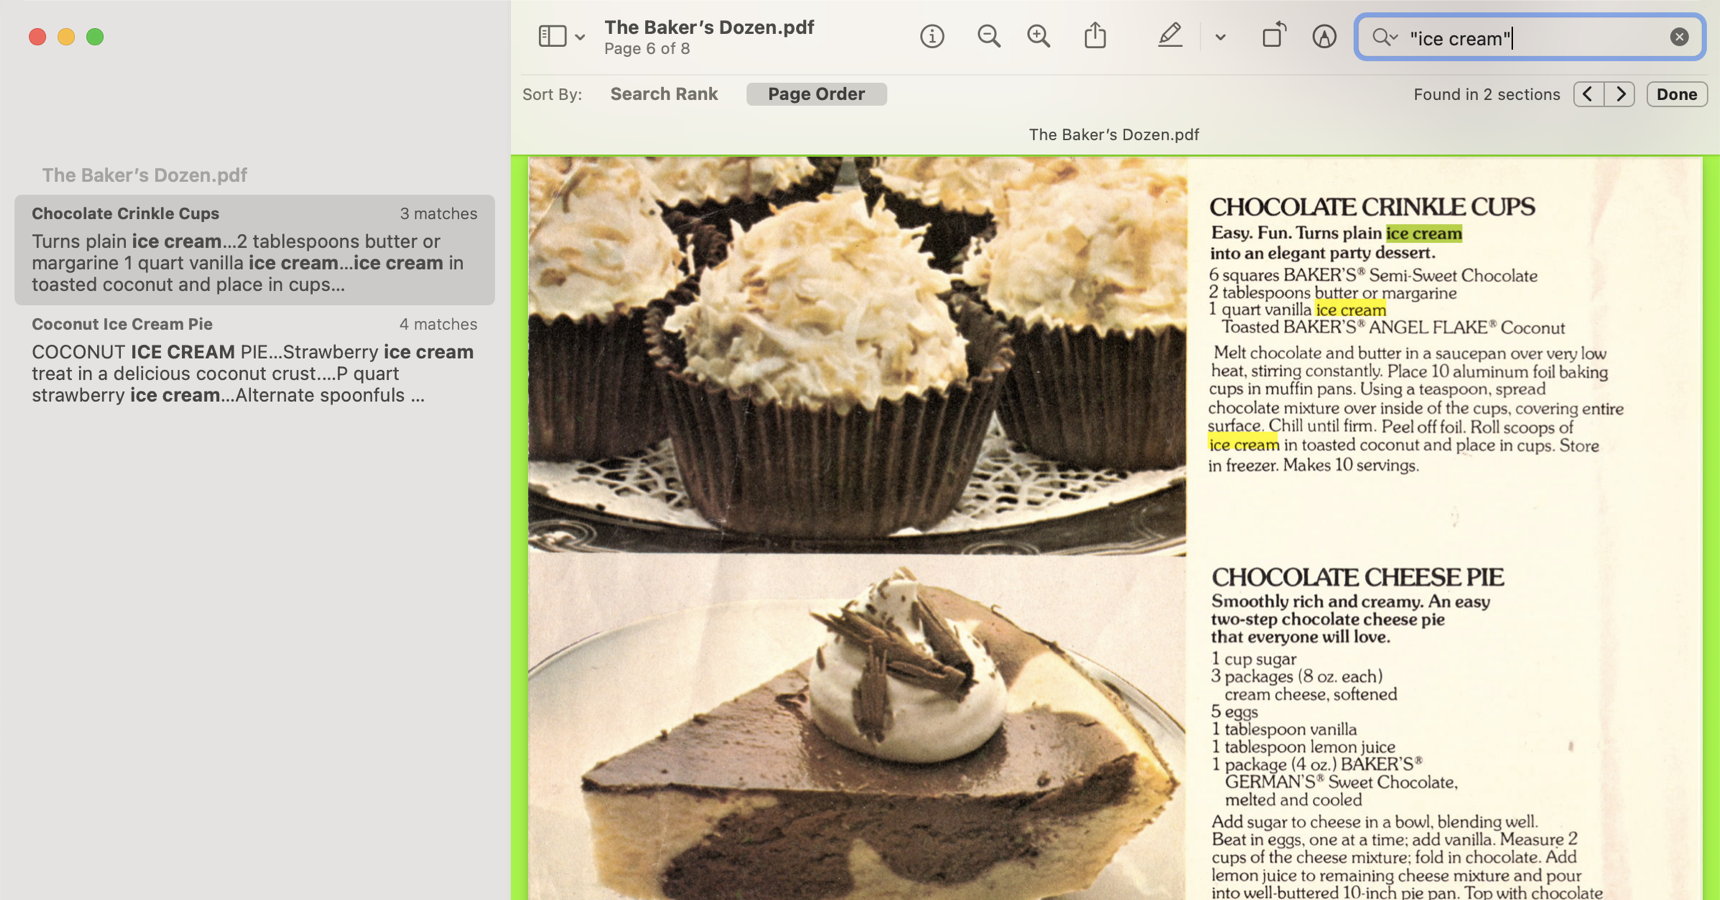
The searchablePDF script creates PDFs that can be searched for text, using VisionKit to recognize the text and PDFDocument to create the PDFs.
I’ve recently acquired several old cooking pamphlets from companies such as Pet Milk, Borden, and so on, that are not yet available on the various Internet vintage cooking archives. I thought it would be nice to scan them myself, but a simple scan with a desktop scanner means they’re just images without the ability to find a particular recipe or ingredient in them.
Of course, the obvious thing to do is OCR them or even just retype them, and then reformat the text in a word processor and save that to PDF. I have done this with some texts, such as a Franklin Golden Syrup pamphlet and a Dominion Waffle Maker instruction manual.
But part of the thrill of collecting old cookbooks is seeing them in their original format with their original font and other formatting intact, warts and all. That’s what elicits “I remember that ad!” comments for the newer ones, and evokes a sense of history for all of them.
The Baker’s Dozen is a perfect example of that. The recipes are good—often great—but the overall effect would not be nearly as interesting without the mid-seventies photo and advertising style.
Swift, using PDFDocument and PDFPage can easily create a PDF from a series of images. Which I’ve never done because it’s almost as easy to just drag the series of images into an empty Preview document and save that as a PDF file.
Neither method of creating a PDF adds any ability to search them. It would be nice to both maintain the original formatting and add the ability to quickly navigate the document, either through a table of contents—something easily created using PDFDocument and PDFOutline in PDFKit—or by searching the text. Or, better yet, both.
- Bluetooth battery early warning system—Wednesday, December 7th, 2022
-
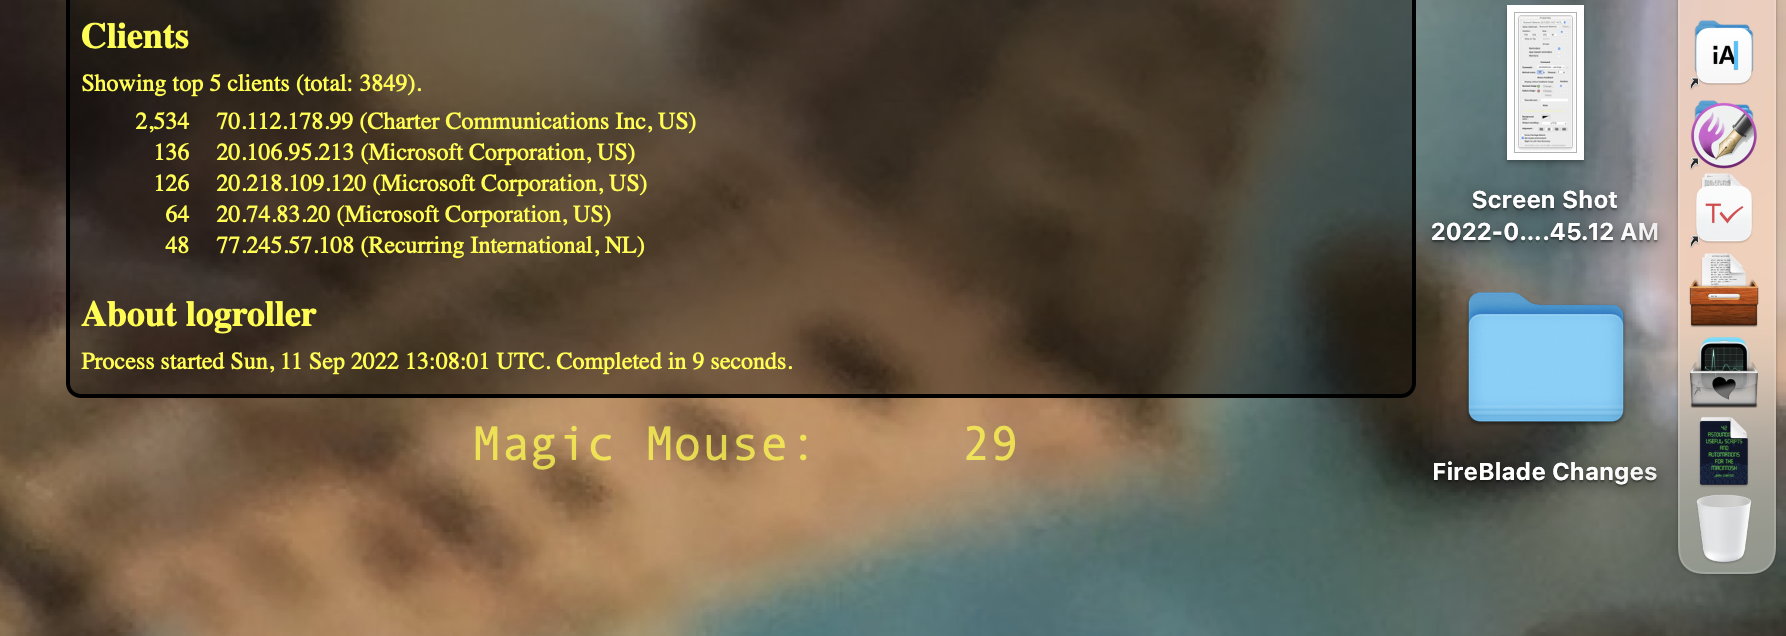
The notification from macOS that a mouse battery is running low usually comes too late and at inopportune times. When it happens I soon need to stop everything or get a USB mouse somewhere.
What I usually end up doing is taking an unplanned break for a few minutes to get the mouse battery back up to a safe level, and then go back to work. And forget to plug it in for the long term when I’m done working.
It would be nice if I could customize the warning to happen earlier and be both obvious and unobtrusive when it does happen. GeekTool is perfect for obvious and unobtrusive. All I need is a script to generate the text to display and it will show up on the desktop, and only when it needs to.
If you always want to see the battery level of all battery-operated devices, use
~/bin/batteries. In GeekTool (or on the command line) you can add the--colorsswitch to display different levels with different colors; there is a warning level set to yellow, a critical level set to red, and anything else is green.- use Term::ANSIColor;
- $normal = color 'green';
- $warning = color 'yellow';
- $critical = color 'red';
- $clear = color 'reset';
- $warningLevel = 30;
- $criticalLevel = $warningLevel/2;
I’ve set the warnings to start at 30%, with critical explicitly at half that. I may change my mind later.
Using the actual color names—green, yellow, and red—requires that you have Term::ANSIColor installed. If you don’t, you can replace those codes with the actual color escape sequences:
- $normal = "\e[32m"; #green
- $warning ="\e[33m"; #yellow
- $critical = "\e[31m"; #red
- $clear = "\e[0m";
- $warningLevel = 30;
- $criticalLevel = $warningLevel/2;
If you only want to see the battery level of devices at or below the warning level, use
~/bin/batteries --warningswith or without--colors.If you want to see devices that are charging, even if they’re above the warning level, add
--wiredto the command line. - Simple game menu for the Color Computer 2 with CoCoSDC—Wednesday, September 7th, 2022
-
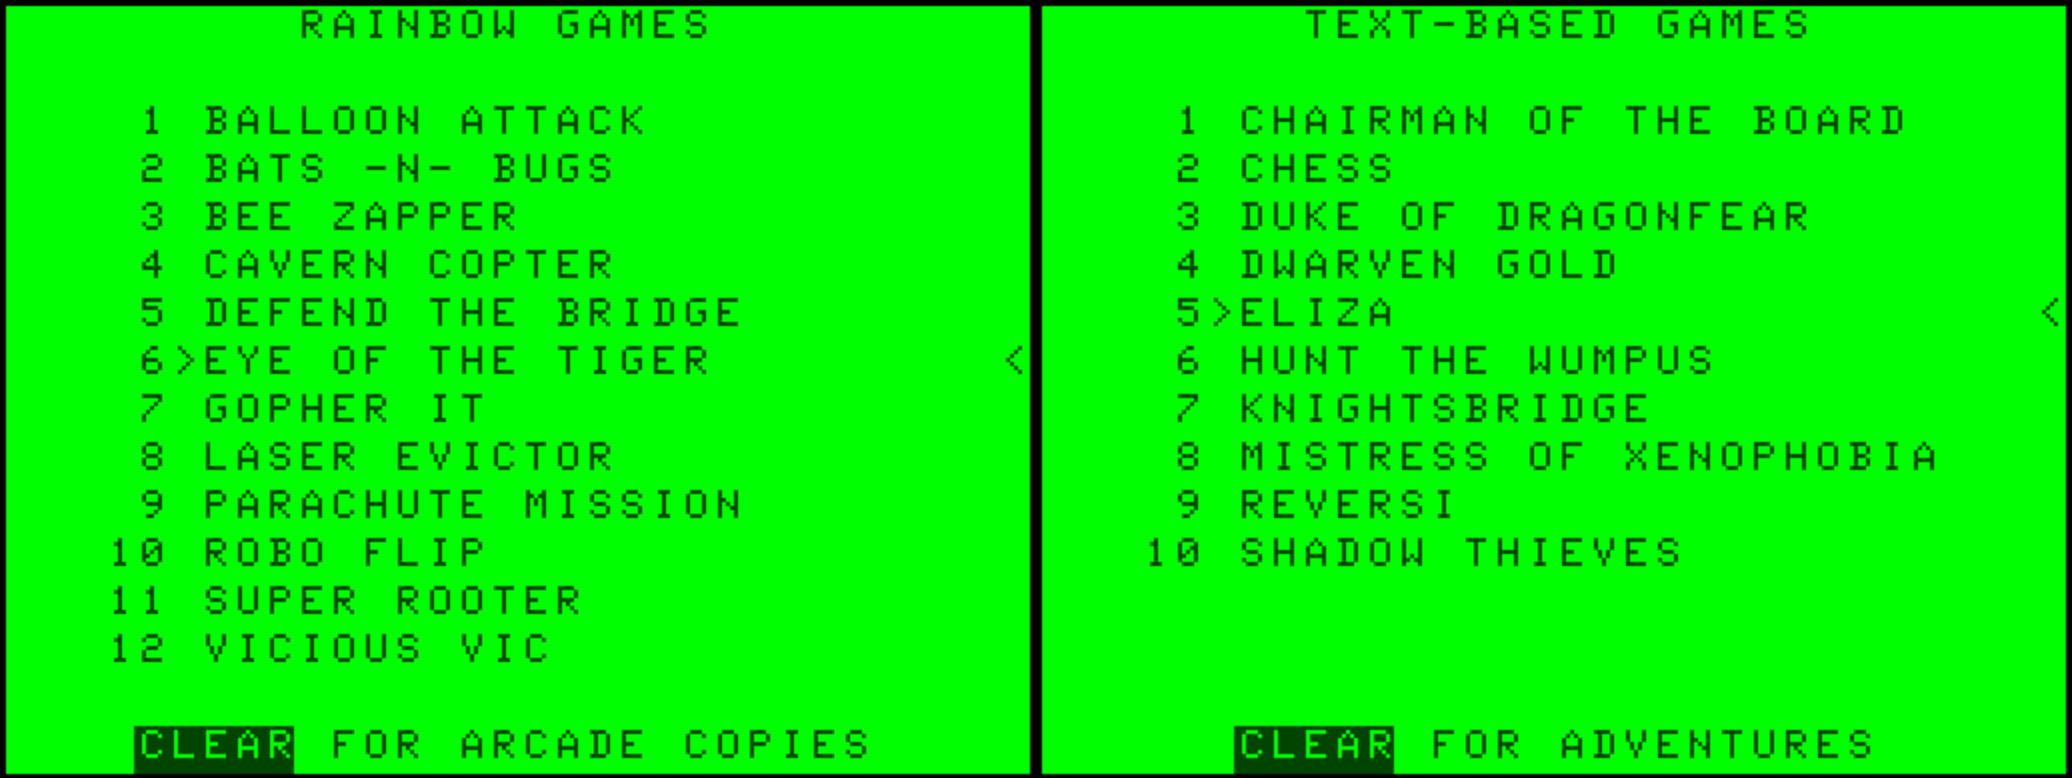
Two menu screens from MENU.BAS: some of my favorite games from The Rainbow, and some of my favorite text-based games typed in from various books.
For the true retro experience, you should, of course, access files from the command line, typing
DIRto see the disk, interpreting the very abbreviated filenames, and then usingRUNorLOADMto start the program. For the full retro experience, everything should be on cassette tape!But your friends may enjoy the retro gaming experience without having any idea how to start up the games. You could, of course, put a coffee-stained sheet with helpful command-line hints next to the computer. Or, you could use this BASIC program, that leverages Darren Atkinson’s CoCo SDC floppy disk emulator to provide a simple interface to your favorite games (Zip file, 8.4 KB) saved on both the SDC’s flash slots and on .DSK disk files.
You can have as many screens as you want. The more screens, the longer it will take to load, and the more screens you (or your friends) will have to cycle through to see everything. I meant this as an easy means of showing off my favorite games; it is not meant as a comprehensive listing of everything. For a more complex file browser, see Guillaume Major’s SDC Explorer.
As written, MENU.BAS requires the SDC, but it should be able to be modified to use other solutions that store programs in ways that they can be accessed from a BASIC program.
The program attempts to respond to whatever the user might do to choose a game. If they pick up one of the joysticks, it will start following that joystick; if they use the up or down arrow keys, it will respond to them; SHIFT-up and SHIFT-down will move to the top and bottom, respectively. If they type the number corresponding to a game, the pointer will jump directly to that game.
- Simple .ics iCalendar file creator—Wednesday, August 3rd, 2022
-
Our high school class was very small, and so our high school reunions are small affairs. There were, for example, all of three events this year: a meet-and-greet, a dinner, and a lunch memorial. Even with such a small calendar, people still find a calendar file useful. But it’s not worth it to maintain the events in a calendar app (or, worse, create a calendar app). It’s easier just to keep the events in a simple text file.
So I made a Perl script to convert a simple text file of events into an iCalendar .ics file (Zip file, 10.7 KB). All it needs is a text file like this:
- ## Lost Castle of the Astronomers
- July 15
- 12:00 PM
- 5 hours
- **Table 2**
- The mountains of West Highland are dotted with the ruins of lost scholarly orders. The Astronomers, in the Deep Forest south of the Leather Road, have been silent for a hundred years, unheard from since the goblin wars that so devastated Highland. Only vague references remain to taunt treasure hunters and spell seekers.
- The Deep Forest is a dangerous place, home to many strange creatures. Only adventurers of stout heart and cunning can hope to penetrate the forest and return alive.
Very simple, and it’s obvious what this text means. In fact, if you open this in pretty much any modern text editor it will be formatted to highlight the important bits and to keep the separate events readable as separate events, because this is very simple Markdown text.
It’s also easy enough for a Perl script to convert to a
.icsfile.The script is meant to take files created for human purposes, not computer purposes. Except for the title of the event, which must always come first (and always be preceded by two hash marks—that is, a Markdown level-2 headline), the order of information doesn’t matter. If the script doesn’t recognize a piece of information, it assumes that it’s part of the description. It completely ignores blank lines.
Use the script like this:
- calmaker Gods\ \&\ Monsters\ MiniCon.txt > minicon.ics
You can, of course, leave off the
> minicon.icsto see the calendar file output to your Terminal screen.The above event will be transformed into this:


