Create searchable PDFs in Swift
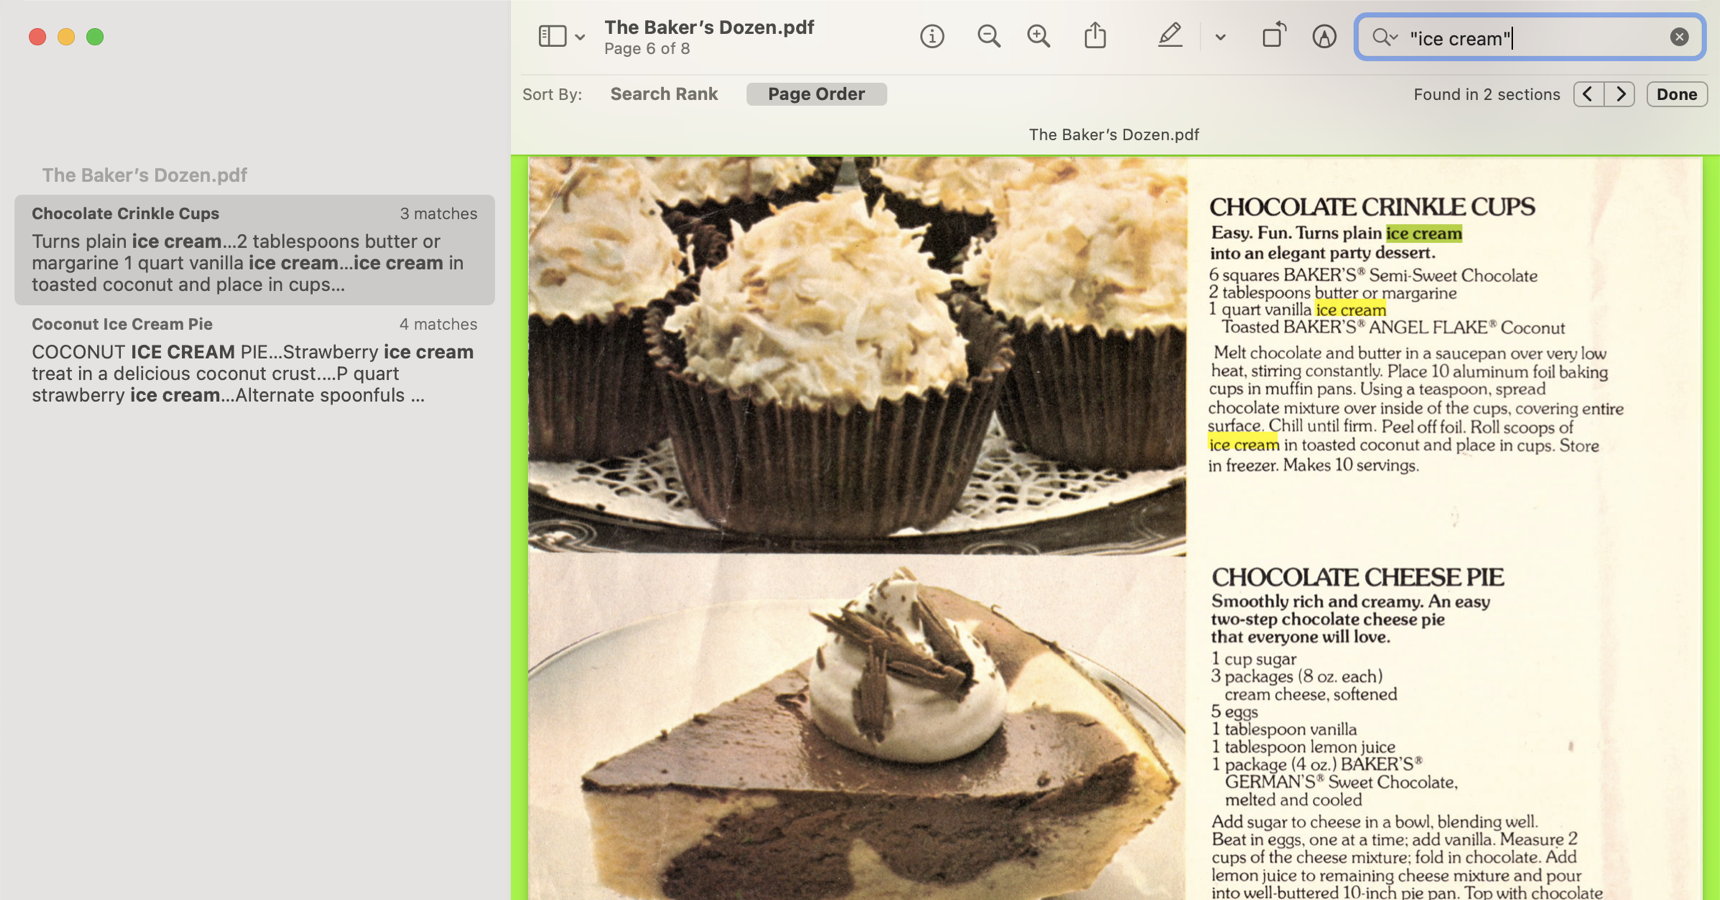
The searchablePDF script creates PDFs that can be searched for text, using VisionKit to recognize the text and PDFDocument to create the PDFs.
I’ve recently acquired several old cooking pamphlets from companies such as Pet Milk, Borden, and so on, that are not yet available on the various Internet vintage cooking archives. I thought it would be nice to scan them myself, but a simple scan with a desktop scanner means they’re just images without the ability to find a particular recipe or ingredient in them.
Of course, the obvious thing to do is OCR them or even just retype them, and then reformat the text in a word processor and save that to PDF. I have done this with some texts, such as a Franklin Golden Syrup pamphlet and a Dominion Waffle Maker instruction manual.
But part of the thrill of collecting old cookbooks is seeing them in their original format with their original font and other formatting intact, warts and all. That’s what elicits “I remember that ad!” comments for the newer ones, and evokes a sense of history for all of them.
The Baker’s Dozen is a perfect example of that. The recipes are good—often great—but the overall effect would not be nearly as interesting without the mid-seventies photo and advertising style.
Swift, using PDFDocument and PDFPage can easily create a PDF from a series of images. Which I’ve never done because it’s almost as easy to just drag the series of images into an empty Preview document and save that as a PDF file.
Neither method of creating a PDF adds any ability to search them. It would be nice to both maintain the original formatting and add the ability to quickly navigate the document, either through a table of contents—something easily created using PDFDocument and PDFOutline in PDFKit—or by searching the text. Or, better yet, both.
So I wrote a script (Zip file, 8.9 KB) that uses PDFKit and VisionKit to scan a series of images and turn them into a PDF file. VisionKit’s VNImageRequestHandler and VNRecognizeTextRequest can take a CIImage and scan it, returning the text. They even return the texts as VNRecognizedText which includes the rectangle where each text appears on the page.
What those methods do not do is return any information about either the font or font size.
Alexander Weiß explains the neat idea of doing a binary search on the font size necessary to fill that rectangle, using the somewhat arbitrary system font in macOS. He went for a recursive solution. That worked, but when I tried to change the functionality slightly it seemed unnecessarily complex. It doesn’t really look like a recursive problem to me. It’s just a pair of converging values. Making it recursive requires setting up and manipulating flags. Using a loop just involves converging the minimum and maximum font size closer and closer.
I’ve also altered the algorithm to handle maximum height. Besides guessing the appropriate font size for scanned text, I want to add a signature to these books, sometimes on the final page and sometimes on all but the first. So I call the font size guesser with the width of the page and also with the available vertical space where a signature can be placed without overwriting existing text. The function ensures that the signature fits in both the width and the height of the free space at either the top or bottom of each page.
In both cases, the function assumes that there is only one line’s worth of text for scanned text (it doesn’t care for signatures). This appears to be the case currently, but I cannot find any indication that this is the defined, guaranteed behavior. If the VNRecognizedText represents one long sentence that wrapped in the original, this function will make that text too small. It assumes that no wrapping is going on.
Here’s the method for generating a string in a known rectangle. I use it both for putting searchable text under the image, and for adding the signature in available space.
[toggle code]
- //find a font size that approximates the correct width of the box
-
private func estimatedString(text:String, targetWidth:CGFloat) -> NSMutableAttributedString {
- var lowEnd:CGFloat = 0
- var highEnd:CGFloat = 0
- var guess:CGFloat = 5
- let font = NSFont.systemFont(ofSize: 10)
-
while true {
- let attributionGuess = self.fontizeString(text: text, font: font, fontSize: guess)
- let guessWidth = attributionGuess.size().width
-
if guessWidth > targetWidth {
- //need a new guess that is smaller
- highEnd = guess
- guess = (guess + lowEnd)/2
-
} else if guessWidth < targetWidth/self.fontAccuracy {
- //need a new guess that is larger
- lowEnd = guess
-
if highEnd == 0 {
- guess *= 2
-
} else {
- guess = (guess + highEnd)/2
- }
-
} else {
- //close enough
- return attributionGuess
- }
- }
- }
-
private func fontizeString(text: String, font: NSFont, fontSize: CGFloat) -> NSMutableAttributedString {
- var textAttributes: [NSAttributedString.Key: Any] = [:]
- textAttributes[NSAttributedString.Key.font] = font.withSize(fontSize)
- return NSMutableAttributedString(string: text, attributes: textAttributes)
- }
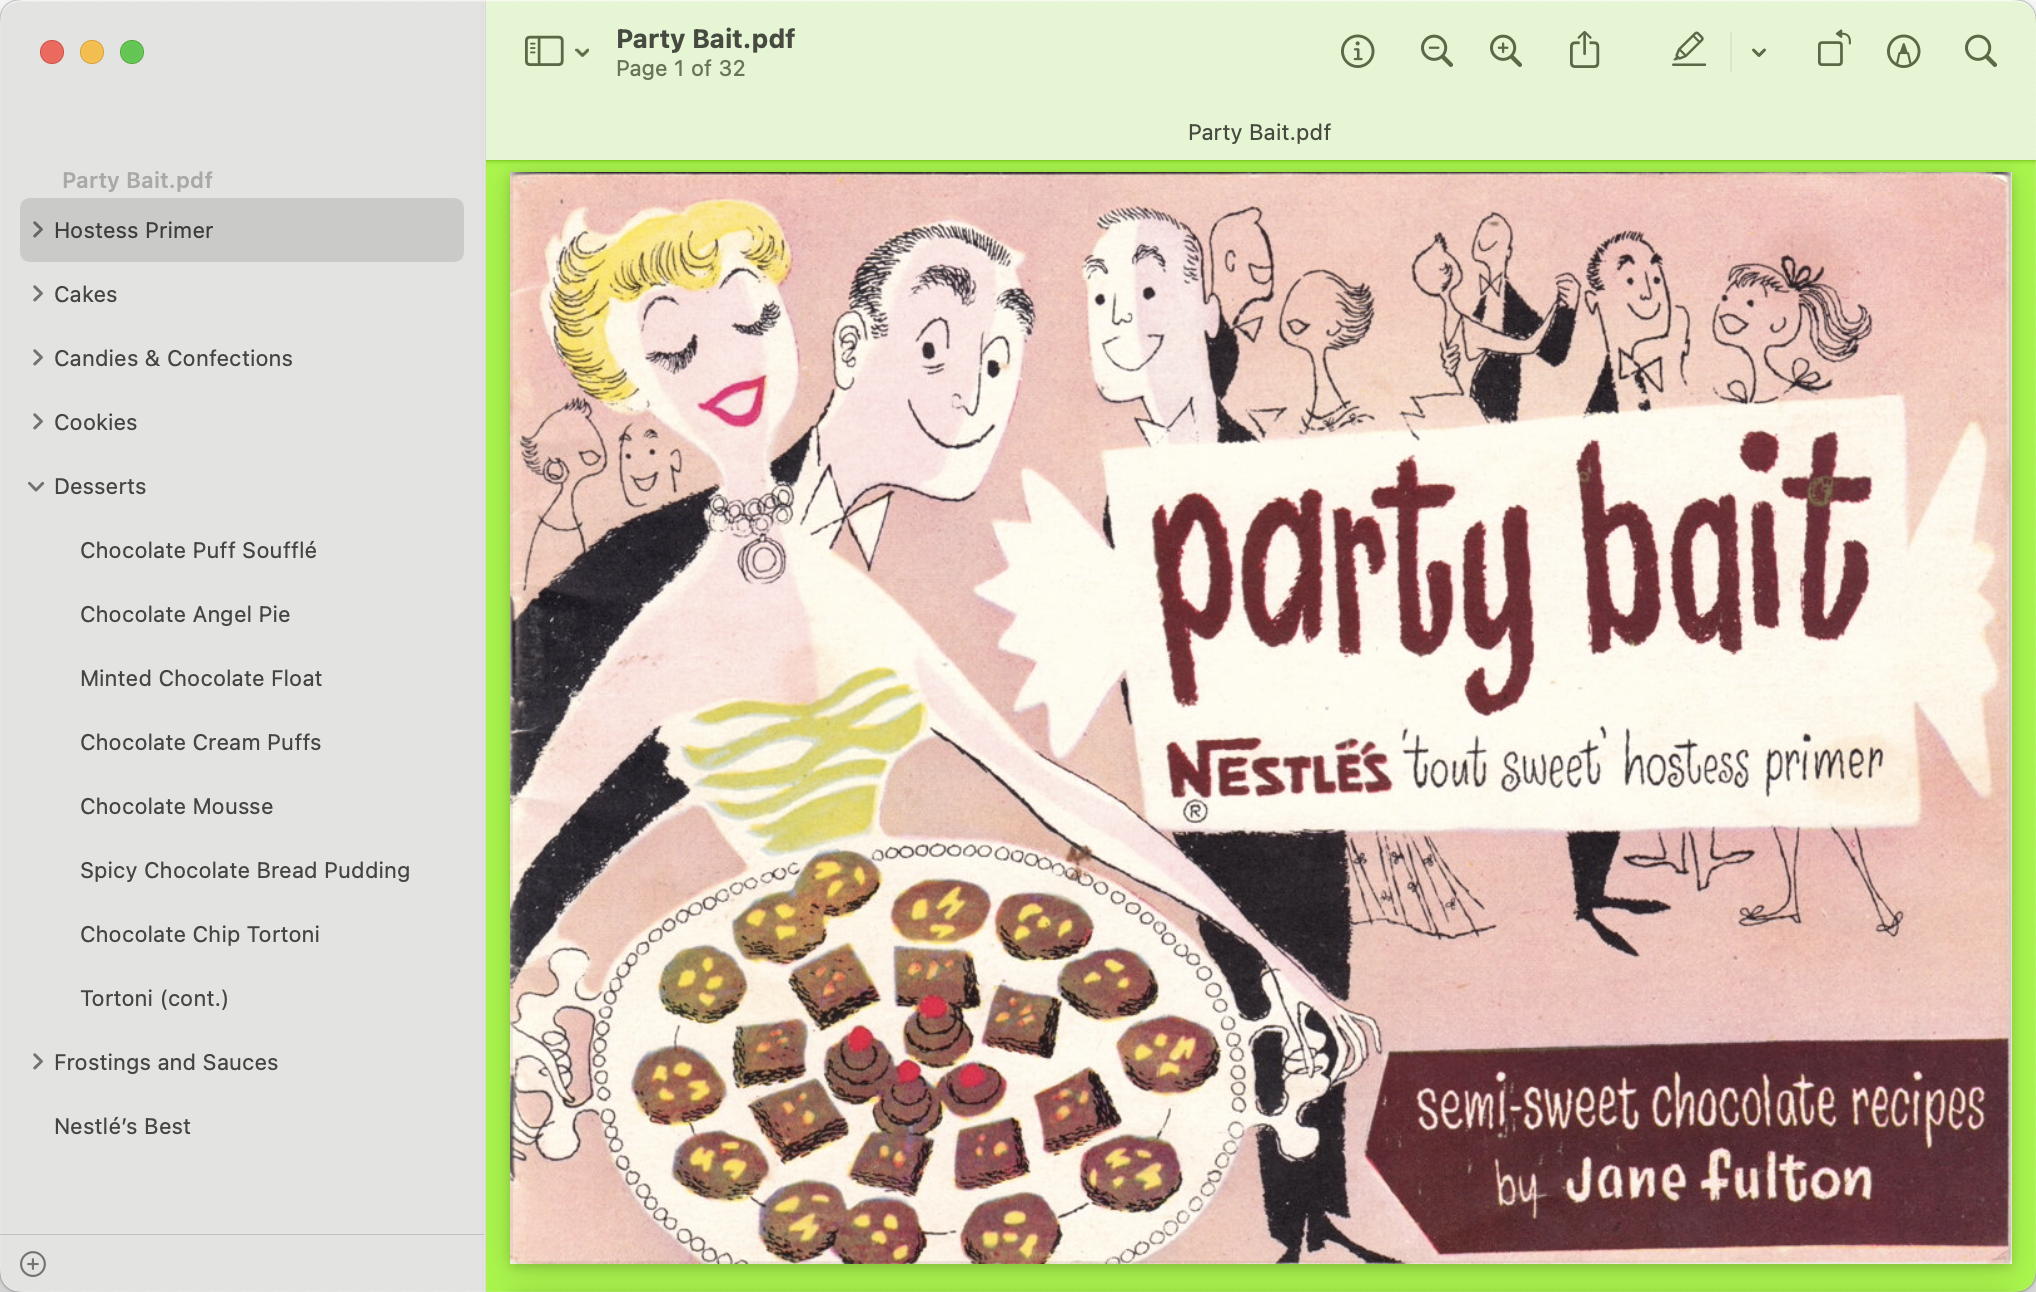
The script will also create a table of contents from the names of each image source file. And as a side note, Nestlé’s 1954 Party Bait is another great example of why merely retyping the text would fail to capture the glory of the original.
As you can see, the logic is very basic.
- It creates a guess for the font size to use.
- It creates an NSMutableAttributedString of the text using that font size.
- If the resulting AttributedString is wider than the rectangle provided by VNRecognizedText, it sets
highEndto the guess and resets the guess lower, halfway between the current guess and the known minimum size (which, at the beginning, is zero). - If the resulting AttributedString is smaller than the box provided by VNRecognizedText, it sets
lowEndto the guess. If there is no high end yet, it doubles the guess; otherwise, it goes for halfway between the guess and the known maximum size.
When checking to see if the guess is too low, it uses a fudge factor called self.fontAccuracy. This allows the script to stop when it gets close enough to the correct font. The method does not use the fudge factor when checking to see if the guess is too high. That’s because if it accepts a font size that’s slightly too big, some of the text will be outside of the box. Text that’s not displayed is also not searchable.
Scanning is very simple using the VN methods.
[toggle code]
-
class DocumentScanner {
- private var image: CIImage
- public var scannedText: [VNRecognizedText] = []
- public var scannedStrings: [String] = []
-
init(image: CIImage) {
- self.image = image
- }
-
public func performScan() {
- let requestHandler = VNImageRequestHandler(ciImage: self.image)
- let request = VNRecognizeTextRequest(completionHandler: self.recognizeTextHandler)
-
do {
- // Perform the text-recognition request.
- try requestHandler.perform([request])
-
} catch {
- print("Unable to perform the requests: \(error).")
- exit(0)
- }
- }
-
private func recognizeTextHandler(request: VNRequest, error: Error?) {
-
guard let observations =
- request.results as? [VNRecognizedTextObservation] else {
- return
- }
-
let topTexts = observations.compactMap { observation in
- return observation.topCandidates(1).first
- }
- self.scannedText = topTexts
-
let recognizedStrings = observations.compactMap { observation in
- return observation.topCandidates(1).first?.string
- }
- self.scannedStrings = recognizedStrings
-
guard let observations =
- }
- }
My DocumentScanner class accepts a CIImage during creation, because VNImageRequestHandler takes a CIImage on creation. This class has two methods beside the initialization method:
- performScan creates a VNImageRequestHandler for the image, and a VNRecognizeTextRequest to handle the OCR.
- recognizeTextHandler is provided to VNRecognizeTextRequest to choose the set of “observations” to save. I choose the first set of observations because
topCandidatessorts them in decreasing order of confidence. The first item is the one it is most confident of.
[toggle code]
-
private func scan() -> [VNRecognizedText] {
- //get the CIImage for scanning the text
-
guard let scannableImage = CIImage(contentsOf: NSURL.fileURL(withPath: self.filepath)) else {
- print("Cannot load image from", self.filepath)
- exit(0)
- }
- let scanner = DocumentScanner(image: scannableImage)
- scanner.performScan()
- return scanner.scannedText
- }
The scan method merely loads the image from a file as a CIImage; sets up DocumentScanner and then calls DocumentScanner’s performScan method. The scannedText it returns is an array of VNRecognizedTexts.
[toggle code]
-
let textImage = NSImage(size:pageSize, flipped:false) { (imageRect) -> Bool in
- //draw each recognized text
-
for text in pageTexts {
-
do {
- let textBox = self.getBoundingBox(text:text, pageRect:imageRect)!
- let textString = self.estimatedString(text:text.string, targetWidth:textBox.width)
- textString.draw(in:textBox)
-
} catch {
- print("Unable to get bounding box for", text.string)
- continue
- }
-
do {
- }
- //and draw the actual image over all of this
-
if !textOnly {
- pageImage.draw(in:imageRect)
- }
- return true
- }
-
public func getBoundingBox(text:VNRecognizedText, pageRect:CGRect) -> CGRect? {
-
do {
- var textBox = try text.boundingBox(for: text.string.startIndex..<text.string.endIndex)!.boundingBox
- textBox = VNImageRectForNormalizedRect(textBox, Int(pageRect.size.width), Int(pageRect.size.height))
- return textBox
-
} catch {
- print("Unable to get bounding box for", text.string)
- }
- return nil
-
do {
- }
This code snippet creates an NSImage by looping over all of the VNRecognizedTexts. For each text, it:
- gets the bounding box of where that text was observed on the page;
- gets an NSMutableAttributedString of the text from the
estimatedStringmethod; - draws the NSMutableAttributedString in the bounding box;
- and, when done with all of the observed texts, it draws the actual page image on top of all of the texts.
For testing purposes, I’ve added a --text switch that does not overlay the image over the text. This allows me to see exactly where the text is being created in the PDF.
And that’s the gist of how this script works. If you look at the full code, you’ll see that there is a method for adding a signature to a page; in my case, that’s usually a short URL to the blog post where I’m discussing this pamphlet.
There’s also a method that resizes the images to a standard height and/or width. If a width is provided, the method calculates the height proportionally to the width. If both a width and a height are provided, it resizes without regard to proportion. This ensures that the PDF is the same dimensions for every page regardless of minor variations during scanning.
PDFs can have a title, a subject, and an author in their metadata. The script accepts options for those values. If no title is provided, the script uses the filename as the title. If no author is provided, the script uses your name from the system as the author.1
Currently, I’ve never needed a table of contents that has more than two levels. So rather than create a complicated hierarchical outline mechanism, the script looks for a plus sign at the end of a label name. If it finds one, it (a) removes it, and (b) assumes that all subsequent labels are directly beneath this entry. This continues until the next label with a “+” at the end of its name, and then that label becomes the top-level parent of all subsequent labels.
There can be more than one label per file; each label needs to be separated in the filename with the pipe character, “|”.
Because of the way I do scans, all of my scanned images are indexed. So the script assumes that all files are in order if sorted by .localizedStandard, which uses the macOS smart sorting method that sorts numerically as well as alphabetically. This ensures that file 10 Marvelous Pies comes after file 9 Short-cut Desserts (cont.) and not after file 1 Change Your Ideas.
Here are the current options for searchablePDF:
| Syntax: | searchablePDF <image list> [--save <filename>] [--verbose] |
| image list: | paths to the images to scan and collect into a PDF file; will be sorted by number and name |
| filenames may contain multiple outline entries separated by |; entries may end in + to mark a top-level headline. | |
| --author <name>: | author of document, defaults to Jerry Stratton |
| --height <inches>: | resize images to specified height |
| --help: | print this help and exit |
| --save: | name of PDF file to create |
| --signature <text> [x] [color] [all|back|blank|front|insert] [bottom|top]: | text for signature (\n is replaced by new line); optionally provide a percentage of the top (or bottom) of page to display in and/or a foreground color; optionally place signature on all pages except first, front, back, or blank pages; default is back page; a blank back page can be inserted |
| --subject <subject>: | subject or short description of document |
| --text: | save only the texts to the PDF, without the images |
| --title <title>: | title of document; defaults to filename |
| --verbose: | display scanned text |
| --width <inches>: | resize images to specified width |
Note that some defaults will depend on values on your system. Where the help text says that the author “defaults to Jerry Stratton”, for example, that’s because the user’s full name on the account I ran this on is “Jerry Stratton”.
Here’s an example of how I created The Baker’s Dozen (PDF File, 3.3 MB):
[toggle code]
- searchablePDF pages/*.jpg --subject "A 1976 recipe pamphlet from Baker’s Coconut" --width 7.5 --height 5.5 --signature "clubpadgett.com/bakers" --save "The Baker’s Dozen"
It’s a 7-½ by 5-½ inch pamphlet. The last page has the URL of the page where I first wrote about The Baker’s Dozen. The file is saved as The Baker’s Dozen.pdf. The subject is set to a description of the pamphlet, and the title is set to “The Baker’s Dozen”, the same as the filename.
Enjoy!
- June 14, 2023: Creating searchable PDFs in Ventura
-
I’ve updated my searchablePDF (Zip file, 8.9 KB) script with a workaround for new behavior in Ventura. As you can see from my archive of old promotional cookbook pamphlets I’ve been using it extensively—and I have a lot more to come! Reading these old books and trying out some of their recipes has been ridiculously fun, and even occasionally tasty.
Recently, a friend of mine gave me an old recipe pamphlet in very bad shape; but it isn’t currently available on any of the online archives, so I decided to scan it anyway, more for historical purposes than as a useful cookbook. This was the first archival scan I did since upgrading to Ventura, and when I was finished and created the PDF, it was practically unreadable.
It was also a lot smaller than the source images. All of the previous PDFs had very predictable file sizes. When running this script under Monterey, all I had to do was sum up all of the source images (easily done by just doing Get Info on the folder they’re in) and that was the size of the resultant PDF file.
In retrospect, it sounds like in Monterey, where I originally wrote the script, PDFKit was re-using the original image data. I always scan at somewhere from 300 to 600 dpi. In Ventura it seems to be regenerating the image data and using the lower resolution of PDFs to do so. PDFs use 72 dots per inch; but PDFKit in Monterey did not downgrade the actual images to 72 dots per inch. Ventura does.
No problem, I thought, I’ll just increase the image’s size before creating the
PDFPage. This worked—to improve the image’s quality. But the PDF opened in Preview as if it were bigger than the screen! Sure enough, Preview reported the document as being some immense number of inches wide and tall.While flailing around looking for a solution, I noticed that if I didn’t bother trying to normalize the images to always be the correct ratio (i.e., for a 4x6 book, the ratio should be ⅔) but just assigned the 4x6
pageSizetoimage.sizeit both maintained the image quality and it created PDFs of the correct size in inches.Because the image wasn’t normalized to the PDF’s size, however, there was weird white space either vertically or horizontally, depending on whether the original image was slightly too wide or slightly too tall.
There’s also a Creator field; this field is meant for storing the application that created the PDF file. The script uses “searchablePDF” and a short URL to this page as the Creator; you can, of course, change that by changing the value of “appName” at the top of the script.
↑
Download
- searchablePDF (Zip file, 8.9 KB)
- A Swift script to take a series of images, sort them, and create a PDF where each image is a page with the OCRed text behind the page’s image.
macOS
- Preview User Guide at Apple Computer
- “Learn how to use Preview on your Mac to work with and change image files and PDF documents.”
programming
- CIImage at Apple Developer Tools
- “You use CIImage objects in conjunction with other Core Image classes—such as CIFilter, CIContext, CIVector, and CIColor—to take advantage of the built-in Core Image filters when processing images.”
- From UIImage to searchable PDF Part 3: Alexander Weiß
- “In the last part part we were using VisionKit to accurately recognize text on captured images. In this part we will bring everything together and create a searchable PDF by combining the image and recognized texts.”
- PDFDocument at Apple Developer Tools
- “An object that represents PDF data or a PDF file and defines methods for writing, searching, and selecting PDF data.”
- PDFKit at Apple Developer Tools
- “Display and manipulate PDF documents in your apps.”
- Recognizing Text in Images at Apple Developer Tools
- “Add text-recognition features to your app using the Vision framework.”
- Vision Framework at Apple Developer Tools
- “Apply computer vision algorithms to perform a variety of tasks on input images and video.”
vintage cookbooks
- Baker’s Dozen Coconut Oatmeal Cookies
- The Baker’s Dozen coconut oatmeal cookies, compared to a very similar recipe from the Fruitport, Michigan bicentennial cookbook.
- Dominion Electric Corporation Wafflemaker Manual
- Dominion Electric Corporation waffle irons are ubiquitous on eBay and in antique shops, but the manuals for them are not. Here’s one that came with the Model 1315A.
- Finding vintage cookbook downloads
- There are several sites for finding vintage cookbooks, from general-purpose online archives to special collections at universities. Here are a few of my favorites.
- Franklin Golden Syrup Recipes
- Golden syrup has a wonderful caramel flavor. This ca. 1910 promotional cookbook from the Franklin Sugar Refining Company really shows off that flavor.
- Three from the Baker’s Dozen
- Three recipes from a Baker’s Coconut pamphlet once included in McCall’s magazine: coconut squares, chocolate cheesecake, and broiled coconut topping.
More PDF
- Creating searchable PDFs in Ventura
- My searchablePDF script’s behavior changed strangely after upgrading to Ventura. All of the pages are generated at extremely low quality. This can be fixed by generating a JPEG representation before generating the PDF pages.
- Quality compressed PDFs in Mac OS X Lion
- The instructions for creating a “reduce PDF file size” filter in Lion are the same as for earlier versions of Mac OS X—except that for some reason ColorSync saves the filter in the wrong place (or, I guess, Preview is looking for them in the wrong place).
- Calculating true three-fold PDF in Python
- Calculating a true three-fold PDF requires determining exactly where the folds should occur.
- Adding links to PDF in Python
- It is very easy to add links to PDF documents using reportlab or platypus in Python.
- Multiple column PDF generation in Python
- You can use ReportLab’s Platypus to generate multi-column PDFs in Snakelets, Django, or any Python app.
- Four more pages with the topic PDF, and other related pages
More PDFKit
- Creating searchable PDFs in Ventura
- My searchablePDF script’s behavior changed strangely after upgrading to Ventura. All of the pages are generated at extremely low quality. This can be fixed by generating a JPEG representation before generating the PDF pages.
More Swift
- Creating searchable PDFs in Ventura
- My searchablePDF script’s behavior changed strangely after upgrading to Ventura. All of the pages are generated at extremely low quality. This can be fixed by generating a JPEG representation before generating the PDF pages.
- ISBN (128) Barcode generator for macOS
- Building on the QR code generator, this script uses CIFilter to generate a Code 128 barcode for encoding ISBNs on book covers.
- Place a QR code over an image in macOS
- It's simple in Swift to create a QR code and place it over an image from your Photos or from any file on your computer.
- Caption this! Add captions to image files
- Need a quick caption for an image? This command-line script uses Swift to tack a caption above, below, or right on top of, any image macOS understands.
- Catalina vs. Mojave for Scripters
- More detail about the issues I ran into updating the scripts from 42 Astounding Scripts for Catalina.
- Three more pages with the topic Swift, and other related pages
