Place a QR code over an image in macOS
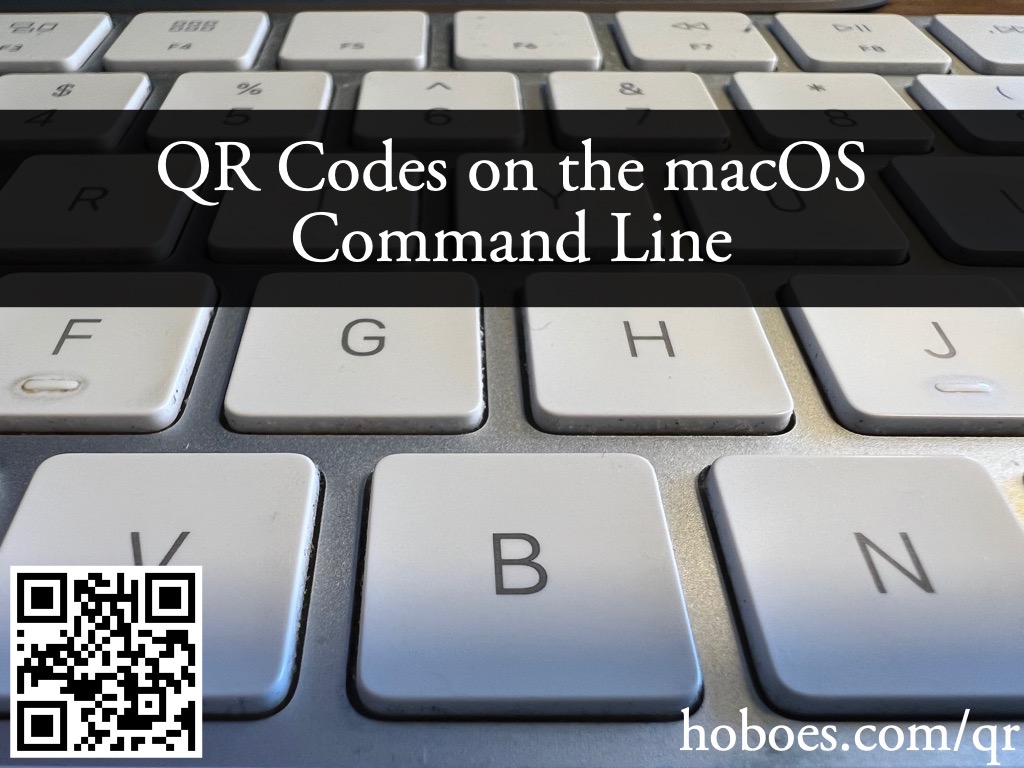
You can caption an image with more than just text. I was looking at a QR code the other day and wondered, how hard would it be to create one of my own for my postcard project? So I created this command-line script (Zip file, 4.0 KB) to take an image and some text, and create a QR image from it. Having done that, it was a relatively simple step to layer the QR code over an existing image from my Mac.
I usually just drag a photo from the Photos app onto the command line to generate a captioned image or a QR-coded image.
| image | filepath to image to overlay QR code on |
|---|---|
| text | text to encode into QR square |
| --align <alignments> | align QR code to top, bottom, right, left, center, right-center, or left-center |
| --aztec | use Aztec code generator |
| --bgcolor <color> | QR code background color (formats: r,g,b,[f]; FFFFFF[FF]; grey) |
| --fgcolor <color> | QR code foreground color (formats: r,g,b,[f]; FFFFFF[FF]; grey) |
| --help | print this help and exit |
| --level <level> | set QR code correction level low, medium, quartile, or high |
| --opacity <0-100> | set the opacity on the background image |
| --ratio <10-90> | ratio of QR code to image size; current: 25.0 |
| --save | filename to save as |
| --width <size> | create an image this many pixels wide |
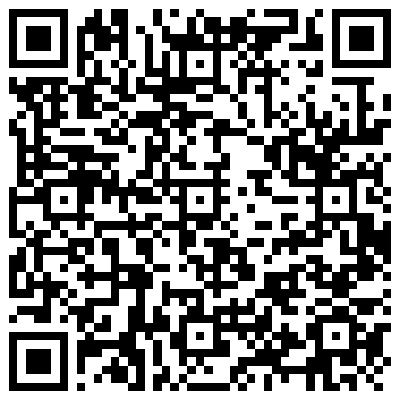
QR codes can be created on their own with just the text that should be encoded. I created the bare QR code for this blog post using:
- qr "“Be cautious, but be adventurous and the rewards will be tremendous.”—James S. Coan, Basic FORTRAN, p. 83" --save caution.png
The image can be saved as anything; be aware that if you don’t specify a file to save as, it will save it as “QR.png”, and it will erase any existing “QR.png”.
I created the image for this blog post using:
- qr https://hoboes.com/qr keyboard.jpg --save keyboardQR.jpg --align left
The code can be aligned vertically and horizontally. Most of the alignments are self-explanatory; left-center and right-center align horizontally to the center of the left half of the image or to the right half of the image, respectively.
Alignments make no difference if you’re creating a QR code on its own, without a background image.
QR codes default to black and white, because those really are the best colors. However, QR codes can be any color. The foreground color should be significantly darker than the background color. I’ve added a check for contrast ratio, using the relative luminance calculations from W3C. It will warn if it detects a low contrast ratio, one less than 3.0. I expect this is not an exact science. Further, if you use any transparency in your colors there’s really no way of calculating the contrast ratio because it will vary across the code depending on what’s behind it.
I tend to leave the level to the default (medium), but you can specify low, quartile, or high, which correspond to the L, Q, and H options to QRCodeGenerator.
The default is to use either 400 pixels or the dimensions of the background image for the size of the created image. You can specify any width, however, and it will use that. The height of a bare QR code is the same as its width; the height of a combined QR code and background image will be relative to the source image’s width and the requested width.
URLs should start with http:// or https:// and that text should be lower case. The rest of it should be whatever you need it to be (for the domain) and the web server needs it to be (for the path). For example, https://ClubPadgett.com/, or https://www.hoboes.com/Mimsy/. Capitalization doesn’t matter in the domain, so I capitalized the two words in clubpadgett.com. This reduces the chance of misreading words, as in the infamous Pen Island.
Capitalization does often matter for the path; while many servers will correct incorrect capitalization of the files and folders in the URL, some will not, and why increase the chance of future errors when optional behavior changes?
A Coan Koan.
I strongly recommend that you copy and paste your URLs from the browser for use as a QR code. It’s very annoying to have to reprint a flyer after you’ve paid for a thousand copies just because you mistyped the URL for the QR code and it can’t be fixed server-side.
Often it can be fixed server-side, so ask your webmaster. But, again, why increase the chance for error? Copy and paste your URLs while viewing the target page. Just do it! The only exception is if you’re using an URL shortener, and then you’ll copy and paste your URL from the URL shortener manager. You might think you’re not going to mistype a twenty-character URL. Over time, you will always be wrong.
The macOS has QR generation built in. It requires creating a CIFilter using CIQRCodeGenerator.
[toggle code]
- //generate QR Code
-
guard var qrData = qrText.data(using: String.Encoding.utf8) else {
- print("Unable to get text as data.")
- exit(0)
- }
- var qrImage:CIImage? = nil
-
if let qrFilter = CIFilter(name: generator) {
- qrFilter.setValue(qrData, forKey: "inputMessage")
-
if correctionLevel != "" {
- qrFilter.setValue(correctionLevel, forKey: "inputCorrectionLevel")
- }
-
guard let qrRawImage = qrFilter.outputImage else {
- help(message:"Unable to create QR code from " + qrText)
- exit(0)
- }
- let qrScale = qrSide/qrRawImage.extent.size.width
- qrImage = qrFilter.outputImage?.transformed(by: CGAffineTransform(scaleX: qrScale, y: qrScale))
- let qrColors = ["inputColor0":fgColor, "inputColor1":bgColor]
- qrImage = qrImage?.applyingFilter("CIFalseColor", parameters: qrColors)
-
} else {
- print("Unable to get QR code generator")
- exit(0)
- }
The default generator is “CIQRCodeGenerator”. This is the most widely supported QR code. The macOS libraries have the ability to generate Aztec codes using CIAztecCodeGenerator. However, iOS doesn’t appear to support reading Aztec codes yet. If you want to play around with Aztec codes, use --aztec. They’re interesting; the orientation mark is in the center, instead of on the sides. They also don’t appear to support UTF8 characters.
There are three steps to generating a QR code:
- Set up the CIFilter with the requested correction level.
- Scale the resulting image as necessary.
- Adjust the foreground and background colors.
When there’s a background image, I scale the code square to be as large as the lower of the background image’s width and height, because that seems to help readability over scaling the code square to be its final size.
The only tricky bit is that both photos and saving images (as I understand how to do it) requires NSImage. The QR generation code is in Core Image. This requires a simple conversion.
[toggle code]
- //convert image to desired format
- var outputImage:NSImage? = nil
- let nsVersion = NSCIImageRep(ciImage: qrImage!)
- let qrNSImage = NSImage(size:nsVersion.size)
- qrNSImage.addRepresentation(nsVersion)
-
if background == nil {
- outputImage = qrNSImage
-
} else {
- //code to combine background image and qr image
- }
If there is no background image, the converted qrImage is directly copied to the outputImage. Saving is handled exactly as it was in the caption script.
If there is a background image, the two must be combined.
[toggle code]
- //size and potentially resize the image
- var imageSize = background!.size
- var qrSize = qrNSImage.size
-
if imageWidth != 0 {
- let imageRatio = imageWidth/imageSize.width
- imageSize.width *= imageRatio
- imageSize.height *= imageRatio
- qrSize.width *= imageRatio
- qrSize.height *= imageRatio
- }
- let padding = imageSize.width*0.005
- var qrY:CGFloat
- var qrX:CGFloat
- let qrHeight = qrSize.height*qrRatio/100
- let qrWidth = qrSize.width*qrRatio/100
-
switch vertical {
-
case "top":
- qrY = imageSize.height-padding-qrHeight
-
case "center":
- qrY = (imageSize.height-qrHeight)/2
-
default:
- qrY = padding
-
case "top":
- }
-
switch horizontal {
-
case "left":
- qrX = padding
-
case "center":
- qrX = (imageSize.width-qrWidth)/2
-
case "left-center":
- qrX = (imageSize.width/2-qrWidth)/2
-
case "right-center":
- qrX = (imageSize.width/2-qrWidth)/2 + imageSize.width/2
-
default:
- qrX = imageSize.width-qrWidth-padding
-
case "left":
- }
- let qrLocation = NSRect(x:qrX, y:qrY, width:qrWidth, height:qrHeight)
- //combine the two images
-
let combinedImage = NSImage(size:imageSize, flipped:false) { (outputRect) -> Bool in
- background!.draw(in:outputRect)
-
if opacity > 0 {
- let opacityColor = NSColor(red:1, green:1, blue:2, alpha:opacity/100)
- opacityColor.setFill()
- outputRect.fill()
- }
- qrNSImage.draw(in:qrLocation)
- return true
- }
- outputImage = combinedImage
The actual combination of the two images is only a few lines. The bulk of this code is for positioning the QR image, and the second-largest bulk is for resizing the image if a specific width has been requested.
I strongly prefer simple options when I write command line scripts; that’s why the options for alignment are simply left, right, center, and so on, instead of specifying a specific numeric location. The same is true for padding. I prefer to find the best padding and use it. Unless I end up needing a different padding, I’m not going to bother adding code to specify different paddings.
Obviously, you could do differently, though I would recommend making padding (for example) be a percentage of the width of the image rather than a specific number of pixels. This ensures that if you change the width, the padding remains relatively the same. The same is true of positioning: if you do need hard positioning, make it a percentage of the image rather than by pixel location.
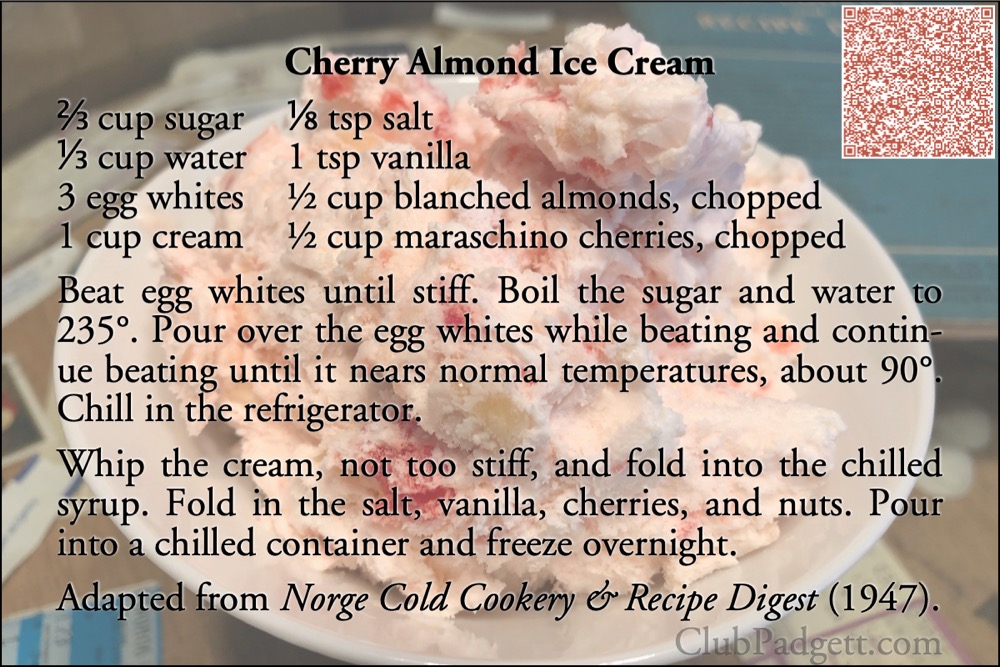
As I was writing this post, I decided I did need to be able to specify a ratio of QR code size to overall image size, instead of hardcoding 25.0%. That was for the Cherry Almond Ice Cream postcard, that I created with:
- cat Cherry\ Cream.txt | qr Cherry\ Cream.png --align top --save cherry.png --ratio 23 --fgcolor BE5744 --width 1000
Otherwise, the QR code would have been just barely too close to the recipe’s text.
This is also an example of the upper limit of how much text can be crammed into a small code square. Instead of a URL, I used this QR block to encode the recipe itself, so that people can copy and paste the recipe from a paper postcard. If you attempt to decode the square on your computer screen, you should see the recipe for the Cherry Almond Ice Cream. If you print the image out as a 6x4 postcard, whether you can decode the recipe will depend on the quality of your printer and your camera.
Besides being an example of how to create QR codes on the macOS command line, this script (Zip file, 4.0 KB) is also a good example of how to overlay one image on top of another. You could gut the script of the QR generator and rewrite it to create a collage of multiple images, or provide an inset of one image on top of another, for example.
It’s very cool what you can do with images on the macOS command line, using Swift and the built-in image routines.
In response to Caption this! Add captions to image files: Need a quick caption for an image? This command-line script uses Swift to tack a caption above, below, or right on top of, any image macOS understands.
- Do QR codes have to be black and white?
- “A QR Code doesn’t have to be in a standard black and white form as we usually see it. However, it is very important to note that there are certain mistakes you need to avoid when designing or creating your QR Code if you want your code to be scanned and read easily.”
- Padgett Sunday Supper Club
- Dedicated to the preservation of vintage recipes.
- The Problem with Pen Island at TV Tropes
- “Some names and titles are stored in a way that is not case-sensitive, but doesn’t allow spaces to separate words. So how do you tell one word apart from the next? If you’re not careful, you can end up with names that are quite… odd.”
- QR Code generator (Zip file, 4.0 KB)
- Command line to generate a QR code over an image on macOS.
- QR code with URL, does it *REALLY* need the http://? at Stack Overflow
- “I haven’t found any absolute documentation that says it must have it. But… After testing a number of QR reader apps, it’s clear that many of them will ‘guess’ at a url if there is no http:// in it. But many do not and display it as just a string. Since it’s a URL, it really does need it.”
- Web Content Accessibility Guidelines (WCAG) 2.0
- “Web Content Accessibility Guidelines (WCAG) 2.0 covers a wide range of recommendations for making Web content more accessible. Following these guidelines will make content accessible to a wider range of people with disabilities, including blindness and low vision, deafness and hearing loss, learning disabilities, cognitive limitations, limited movement, speech disabilities, photosensitivity and combinations of these. Following these guidelines will also often make your Web content more usable to users in general.”
More Core Image
- ISBN (128) Barcode generator for macOS
- Building on the QR code generator, this script uses CIFilter to generate a Code 128 barcode for encoding ISBNs on book covers.
More Swift
- Creating searchable PDFs in Ventura
- My searchablePDF script’s behavior changed strangely after upgrading to Ventura. All of the pages are generated at extremely low quality. This can be fixed by generating a JPEG representation before generating the PDF pages.
- Create searchable PDFs in Swift
- This Swift script will take a series of image scans, OCR them, and turn them into a PDF file with a simple table of contents and searchable content—with the original images as the visually readable content.
- ISBN (128) Barcode generator for macOS
- Building on the QR code generator, this script uses CIFilter to generate a Code 128 barcode for encoding ISBNs on book covers.
- Caption this! Add captions to image files
- Need a quick caption for an image? This command-line script uses Swift to tack a caption above, below, or right on top of, any image macOS understands.
- Catalina vs. Mojave for Scripters
- More detail about the issues I ran into updating the scripts from 42 Astounding Scripts for Catalina.
- Three more pages with the topic Swift, and other related pages
