Creating searchable PDFs in Ventura
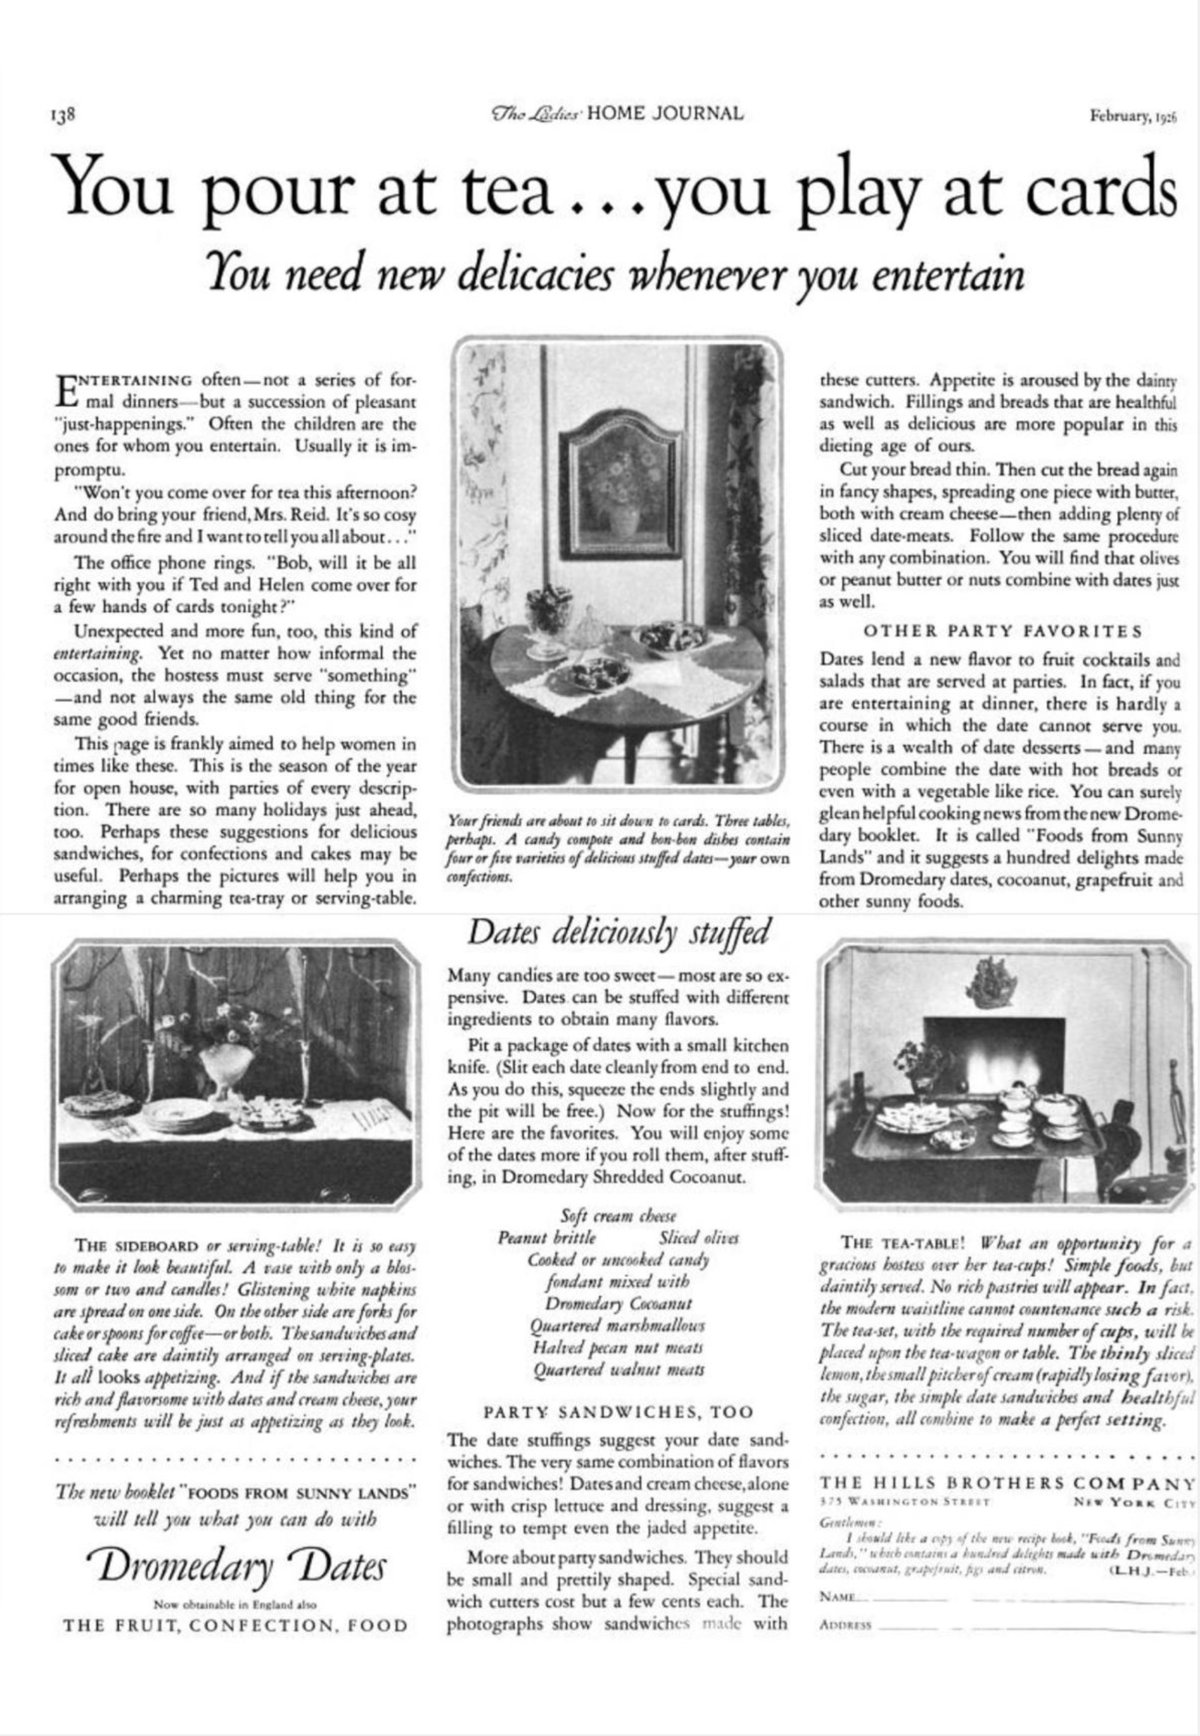
I’ve updated my searchablePDF (Zip file, 8.9 KB) script with a workaround for new behavior in Ventura. As you can see from my archive of old promotional cookbook pamphlets I’ve been using it extensively—and I have a lot more to come! Reading these old books and trying out some of their recipes has been ridiculously fun, and even occasionally tasty.
Recently, a friend of mine gave me an old recipe pamphlet in very bad shape; but it isn’t currently available on any of the online archives, so I decided to scan it anyway, more for historical purposes than as a useful cookbook. This was the first archival scan I did since upgrading to Ventura, and when I was finished and created the PDF, it was practically unreadable.
It was also a lot smaller than the source images. All of the previous PDFs had very predictable file sizes. When running this script under Monterey, all I had to do was sum up all of the source images (easily done by just doing Get Info on the folder they’re in) and that was the size of the resultant PDF file.
In retrospect, it sounds like in Monterey, where I originally wrote the script, PDFKit was re-using the original image data. I always scan at somewhere from 300 to 600 dpi. In Ventura it seems to be regenerating the image data and using the lower resolution of PDFs to do so. PDFs use 72 dots per inch; but PDFKit in Monterey did not downgrade the actual images to 72 dots per inch. Ventura does.
No problem, I thought, I’ll just increase the image’s size before creating the PDFPage. This worked—to improve the image’s quality. But the PDF opened in Preview as if it were bigger than the screen! Sure enough, Preview reported the document as being some immense number of inches wide and tall.
While flailing around looking for a solution, I noticed that if I didn’t bother trying to normalize the images to always be the correct ratio (i.e., for a 4x6 book, the ratio should be ⅔) but just assigned the 4x6 pageSize to image.size it both maintained the image quality and it created PDFs of the correct size in inches.
Because the image wasn’t normalized to the PDF’s size, however, there was weird white space either vertically or horizontally, depending on whether the original image was slightly too wide or slightly too tall.
But why not assign the new page size to the new, normalized NSImage? Unlike doing so to the original image, this actually adjusted the quality of the image, identical in both file size and image quality to just making the NSImage using that page size to begin with.
Giving the normalized NSImage the page’s size after creation created very low quality images. Giving the normalized NSImage a doubled or quadrupled page size after creation improved the quality but also generated zoomed PDFs. This at least meant that the original image’s quality wasn’t being thrown out by the new NSImage. It just wasn’t being used by PDFKit.
Because altering .size directly worked, sort of, with the original NSImage, I experimented with creating file representations of the new, normalized NSImage. At the very worst, I assumed I could literally write out the normalized image at high quality, re-read it as an NSImage, and then adjust its .size. That turned out not to be necessary, however. All that’s required is requesting a representation at the higher resolution; once that representation is created, PDFKit appears to use it rather than generating a very low resolution one.
[toggle code]
- //a data representation needs to be generated, or PDFKit under Ventura will generate a very low quality image
- //at 72 pixels per inch instead of using the original image as it did under Monterey.
-
func toPageSize(image: NSImage, pageSize: NSSize, identifier: String) -> NSImage {
-
guard let imageData = image.tiffRepresentation else {
- print("Trouble adding representation to image", identifier)
- exit(0)
- }
-
guard let bitmapVersion = NSBitmapImageRep(data: imageData) else {
- print("Trouble getting bitmap of image representation for image", identifier)
- exit(0)
- }
-
guard let imageData = bitmapVersion.representation(using: NSBitmapImageRep.FileType.jpeg, properties:[.compressionFactor : compression]) else {
- print("Trouble turning bitmap into a jpeg for image", identifier)
- exit(0)
- }
-
guard let pagedImage = NSImage(data:imageData) else {
- print("Trouble creating image from data for image", identifier)
- exit(0)
- }
- pagedImage.size = pageSize
- return pagedImage
-
guard let imageData = image.tiffRepresentation else {
- }
This generates a JPEG, it then rereads the JPEG data into an NSImage. After creation, it assigns the correct PDF dimensions to the new JPEG.
Because the default JPEG compression is not the same as whatever compression I used when scanning the images, this still generates files of a different size, but it’s a lot closer, and the quality of the PDF’s pages are back up to the quality of the original images. If you look in the real code, you’ll see that I set a compression factor of (as I write this) 0.537 (the value can range from 0.0 to 1.0). That seems to generate PDFs that approximate the sum of the constituent images. I’ll probably turn that into a command-line option if I end up needing different factors but it seems to work well for now.
That’s the major change to the script for Ventura. It’s very much a workaround. I’d rather keep the original image intact, as in Monterey, than re-compress it as this solution does. If you know how to retain the pre-Ventura behavior of NSImage and PDFKit, consider answering this question on StackOverflow.
I’ve also added one new feature, for scanning in very low-quality pamphlets. There is now a --missing option to insert a blank page or multiple blank pages into the document at a specific page, with the text “Missing page xx”.
Besides being mouse-eaten, the low quality pamphlet that got me started on this is missing the middle sheet, which is the middle four pages. So, when generating the PDF from my scans of that pamphlet, I include --missing 46 4 and it adds four blank pages after page 46.
It’s adding the text to the NSImage and not to the PDFPage, something I should probably change. Or possibly not; it lets me use the subroutines for altering the images that I know already work. In order to get around Ventura’s resolution issue, I create the blank image at a higher resolution (currently hardcoded at eight times the page’s dimensions), do the above conversion, and then assign the real page size to it.
There’s a still a minor problem that I haven’t tracked down. Most times I run the script I get a notice that “CoreGraphics PDF has logged an error. Set environment variable "CGPDFVERBOSE" to learn more.”. If I set the environment variable, all I get is a series of warnings, all the same: “Invalid image orientation, assuming 1.”
Since I don’t change the orientation of any of the images, I’m guessing that the invalid orientation value is in the original. “Assuming 1” appears to be the correct thing to do, since there are no incorrectly oriented pages in the PDF.
You can use setenv("CG_PDF_VERBOSE", "1", 1) to view the more detailed errors yourself if you wish—assuming you even see them at all. If, as I suspect, the error is the result of the image editor I’m using, you may not see that error at all.
In response to Create searchable PDFs in Swift: This Swift script will take a series of image scans, OCR them, and turn them into a PDF file with a simple table of contents and searchable content—with the original images as the visually readable content.
- Baker’s Dozen Coconut Oatmeal Cookies
- The Baker’s Dozen coconut oatmeal cookies, compared to a very similar recipe from the Fruitport, Michigan bicentennial cookbook.
- How can I scale an image while retaining quality when creating a PDF in Swift on macOS? at Stack Overflow
- “I have a command-line Swift script that takes a series of images of close to the same pixel dimensions and creates a PDF from them… I upgraded to Ventura last week, and while the scaling was correct the image quality was drastically lower.”
- Promotional Cookbook Archive
- I’ve managed to acquire several old promotional pamphlets and cookbooks that don’t appear to be available elsewhere on the net. I’m making them available here.
- searchablePDF (Zip file, 8.9 KB)
- A Swift script to take a series of images, sort them, and create a PDF where each image is a page with the OCRed text behind the page’s image.
More NSImage
- ISBN (128) Barcode generator for macOS
- Building on the QR code generator, this script uses CIFilter to generate a Code 128 barcode for encoding ISBNs on book covers.
- Caption this! Add captions to image files
- Need a quick caption for an image? This command-line script uses Swift to tack a caption above, below, or right on top of, any image macOS understands.
- Avoiding lockFocus when drawing images in Swift on macOS
- Apple’s recommendation is to avoid lockFocus if you’re not creating images directly for the screen. Here are some examples from my own Swift scripts. You can use this to draw text into an image, and to resize images.
More PDF
- Create searchable PDFs in Swift
- This Swift script will take a series of image scans, OCR them, and turn them into a PDF file with a simple table of contents and searchable content—with the original images as the visually readable content.
- Quality compressed PDFs in Mac OS X Lion
- The instructions for creating a “reduce PDF file size” filter in Lion are the same as for earlier versions of Mac OS X—except that for some reason ColorSync saves the filter in the wrong place (or, I guess, Preview is looking for them in the wrong place).
- Calculating true three-fold PDF in Python
- Calculating a true three-fold PDF requires determining exactly where the folds should occur.
- Adding links to PDF in Python
- It is very easy to add links to PDF documents using reportlab or platypus in Python.
- Multiple column PDF generation in Python
- You can use ReportLab’s Platypus to generate multi-column PDFs in Snakelets, Django, or any Python app.
- Four more pages with the topic PDF, and other related pages
More PDFKit
- Create searchable PDFs in Swift
- This Swift script will take a series of image scans, OCR them, and turn them into a PDF file with a simple table of contents and searchable content—with the original images as the visually readable content.
More Swift
- Create searchable PDFs in Swift
- This Swift script will take a series of image scans, OCR them, and turn them into a PDF file with a simple table of contents and searchable content—with the original images as the visually readable content.
- ISBN (128) Barcode generator for macOS
- Building on the QR code generator, this script uses CIFilter to generate a Code 128 barcode for encoding ISBNs on book covers.
- Place a QR code over an image in macOS
- It's simple in Swift to create a QR code and place it over an image from your Photos or from any file on your computer.
- Caption this! Add captions to image files
- Need a quick caption for an image? This command-line script uses Swift to tack a caption above, below, or right on top of, any image macOS understands.
- Catalina vs. Mojave for Scripters
- More detail about the issues I ran into updating the scripts from 42 Astounding Scripts for Catalina.
- Three more pages with the topic Swift, and other related pages


Thanks for the script! But it seems not actually adding the text layer? At least on my Ventura 13.5.1.
I'm able to see the OCR'd layer in Apple Preview, but not in PDF Expert. However, it seems Apple Preview OCR's it on the fly. I tried to comment out the line 191 "scannedText.drawScan(text:text.string, targetBox:textBox)" and the result is the same: Apple Preview recognizes the page on the fly, but PDF Expert says the page is not OCR'd.
Still, I see your sample PDFs (e.g. Chiquita Banana’s Recipe Book (PDF File, 9.9 MB)) have the actual OCR layer (in PDF Expert).
Am I using it wrong way? Or did it break with the later MacOS releases?
Grisha in New York, NY at 1:30 a.m. September 6th, 2023
TiraT
Grisha, I hope not! I’m using the latest non-beta of 13.3.1, and it still acts as normal.
One way to test would be to use the --text option, to save only the text, and not the images.
Jerry in Texas at 10:51 a.m. September 6th, 2023
yFmrE
Strange, it feels like those versions are not supposed to be that much different.
I created a small test for reproducing it, and placed it on Dropbox: https:/ /www.dropbox.com/ home/Public/ searchable-pdf-test (please, remove the spaces in the URL: this form complains "There is an awfully long word in your comment" if I put the full URL without spaces)
I have a simple image "simple-text.png" there.
I run: ./searchablePDF simple-text.png --save simple-text.pdf
Then I wrote a simple script "getpdftext.swift" that extracts the text from the first page.
I run: swift getpdftext.swift simple-text.pdf
and it prints empty string for "simple-text.pdf". (on your file "Chiquita Recipe Book.pdf" it shows some text)
I included the console output in the "test.output.txt" file.
I did try the --text option, and it works fine (simple-text.text.pdf file), but it doesn't include the textual information besides the text as an image.
It just feels like it's not including the textual information from NSImage to PDFPage. Possibly, it is related to your comment in this post: "It’s adding the text to the NSImage and not to the PDFPage, something I should probably change. Or possibly not; it lets me use the subroutines for altering the images that I know already work." Possibly, it broke between 13.3.1 and 13.5.1?
But what would adding the text directly to PDFPage look like? I didn't find any functions in PDFPage for adding a text layer, except adding annotations, but those are different than the searchable layer.
Grisha in New York, NY at 7:51 p.m. September 6th, 2023
UPpy7
I will take a closer look at your files later. As for adding text to the pdf instead of to the NSImage, I added that note because it seems like it ought to be both possible and better, but I’ve done no research into how or even whether that’s possible. So far all of the pdf creation I’ve done where I create pdf documents from the ground up have been in Python.
Saving an NSImage as a PDF has not in the past converted the text to an image. I use the same technique in Caption this! Add captions to image files. If the NSImage is saved as pdf it retains the text.
If this behavior is about to change that’s going to suck.
Jerry in Texas, USA at 4:26 p.m. September 9th, 2023
XPwsk
The URL to your Dropbox sample file is a personal URL. You will need to get a url that can be shared. (Note that you can paste it into the url field on the comment form rather than add spaces to it so that it wraps well.)
Jerry in Texas, USA at 3:13 a.m. September 10th, 2023
XPwsk
Sorry about the broken link! It seems I can only share an archive on dropbox – I put the link in web page URL field, since it won't let me past it in comment.
I learned a lot about Quartz 2D in the past few days and confirmed rewriting from drawing text on NSImage to drawing using Quartz 2D routines resolves the issue (creating PDF context with CGContext, drawing text with Core Text CTFrameDraw, etc); unfortunately, those are a low level APIs that are harder to use (it seems). Good thing – there is the "CTFramesetter Suggest FrameSize With Constraints" function (I added spaces to avoid the form to complain) that picks the proper font size, so there is no need in binary search of font size. But I still wasn't able to properly aligned the text in the recognized boxes.
Grisha in New York, NY at 10:46 p.m. September 11th, 2023
NKebw
Thanks for that. I haven’t had a chance to take a serious look at your examples, but I appreciate them. I have verified that Ventura has at some point stopped retaining the text when creating PDFs, and just making text-like images.
The same thing has happened in the caption script.
CTFramesetter also sounds interesting.
Jerry in Texas, USA at 12:35 a.m. November 16th, 2023
yFmrE